the Blackthorn Orphans
  • B L O G
  • The Blackthorn Orphans: read it onsite
  • The Blackthorn Orphans TRANSLATIONS PAGE
  • Lovely R BLOG
  • PHOTOESSAYS
  • SELECTED RAVINGS: essays & opinion
  • RUBYHUE Lipstick Review
  • blackthorn ROSE REVIEW
  • KITCHEN BITCH: Recipes etc.
  • verse
  • Hostile Witness FILM REVIEW
  • ALOES & SUCCULENTS
  • Blackthorn Perfume Review
  • B I O
  • C O N T A C T

Kitchen Bitch: Blood Orange & Ginger Jam

6/10/2019

 
Picture
Picture
Not everyone loves marmalade, but that's cool, because this isn't marmalade.  I promise.  Marmalade is justly unpopular with discerning citizens and for very good reason; there's a lot of really shitty material out there, just waiting to drag one's tastebuds on a horror ride from what is this into fucking hell get it off me territory with its puzzlingly perverse and irredeemable bitterness.  

Orange jam is an entirely different thing. 
It is bitter-free, punching down the brilliant, UV-soaked flavours of raw citrus into a slightly caramelised gloop swimming with soft chunks of chewy, jellied, padparadscha goodness and peppery, perfumed ginger.  We both love it and it's possibly my personal all-time favourite jam.  ​You can't really fuck it up either, so feel free to have a go.

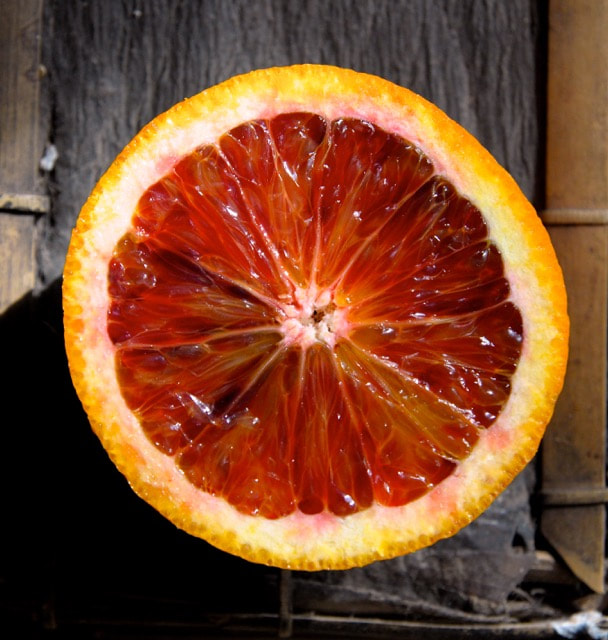
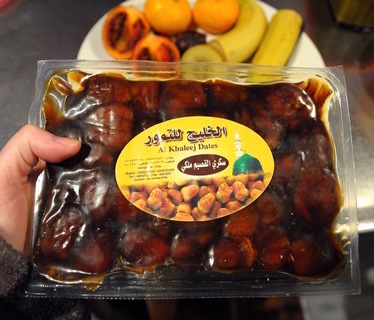
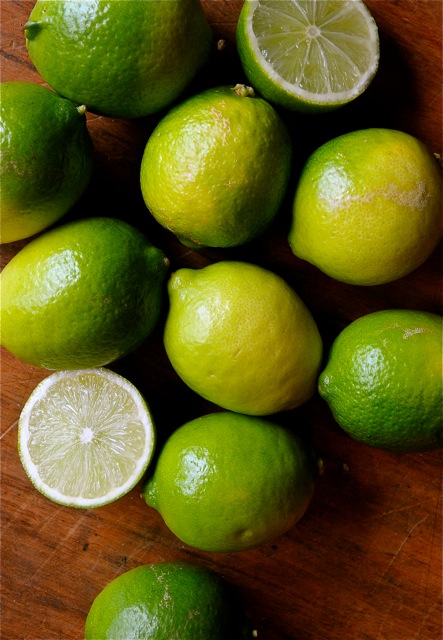
As a confirmed citrus freak, I burn my oral membranes out each and every winter, sucking down every variety I can lay my greedy paws on.  If you've never tasted a blood orange, you will possibly be surprised by the literal nature of their flesh and their lack of upfront acidity.  Their complex, dirty undertones can creep almost toward umami; they're not super-weird, but they're not for everyone.  It isn't absolutely necessary to go hunting them down for this recipe; those brilliant late winter Navels are just as good, if not better preservation prospects, due to the persistence of their high notes and clean sweetness.  I like the bloods because they're a bit exotic and the colour is more intense.
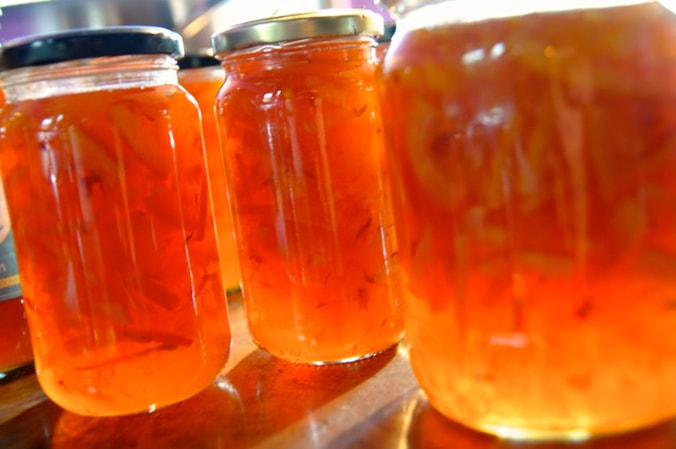
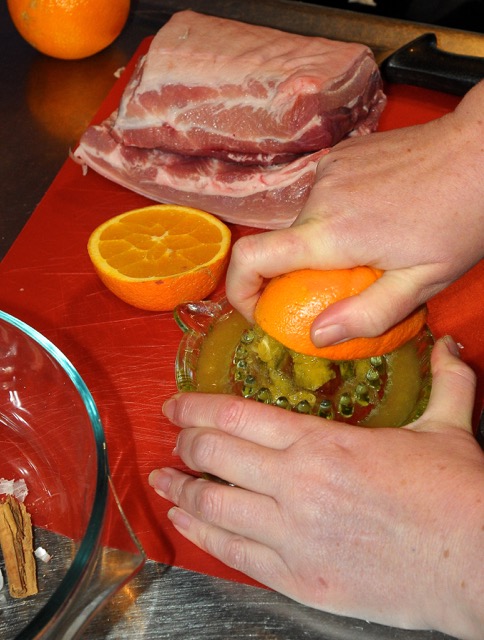
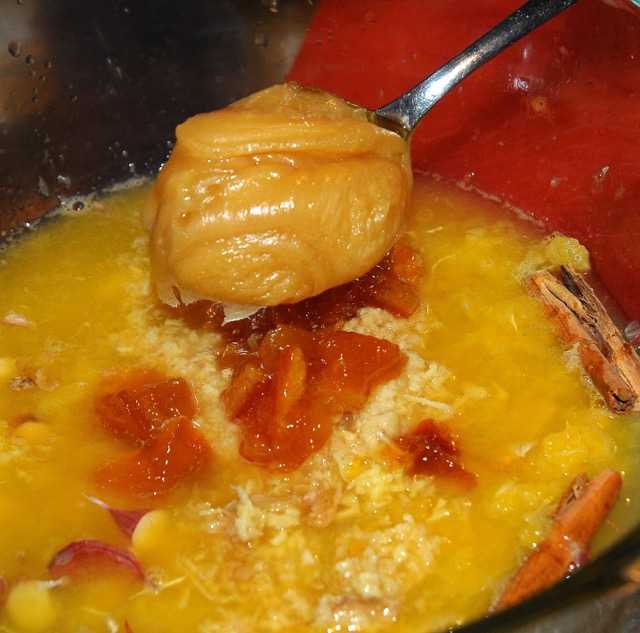
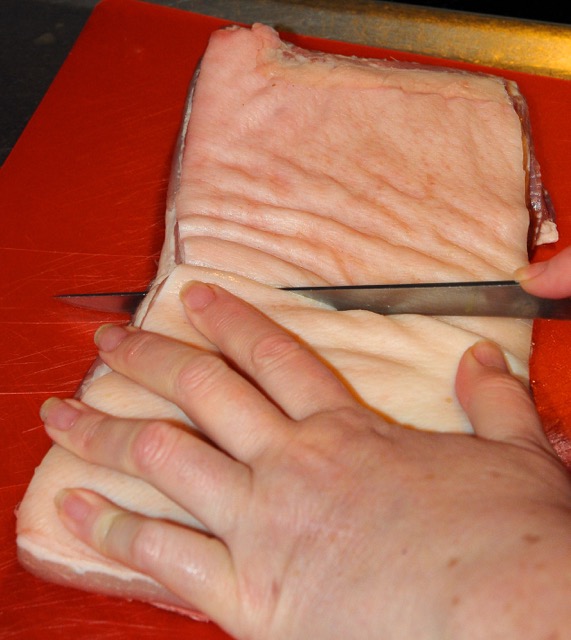
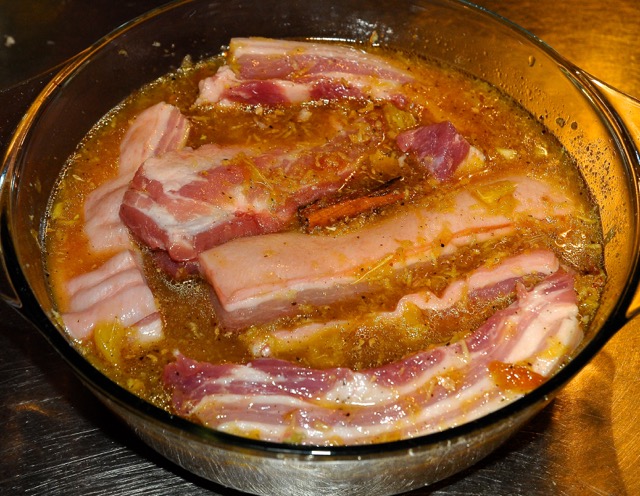
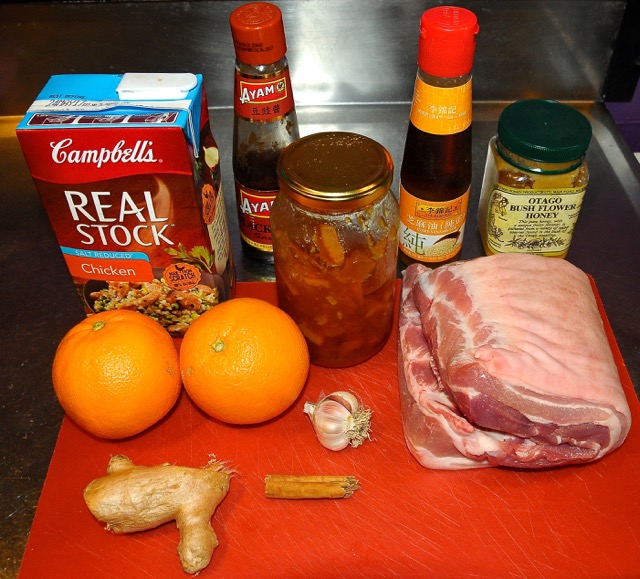
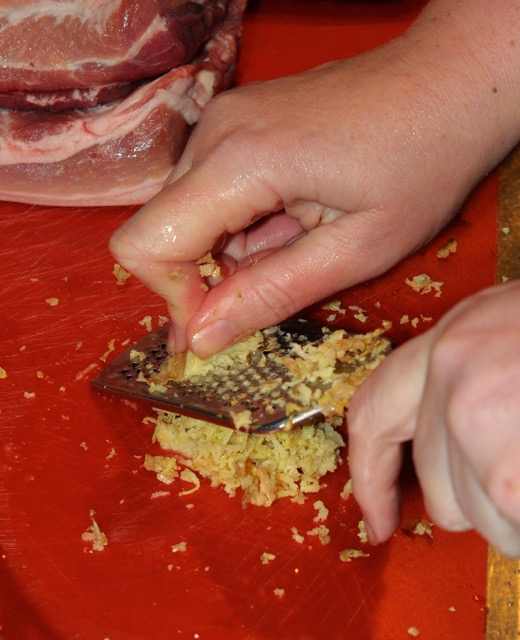
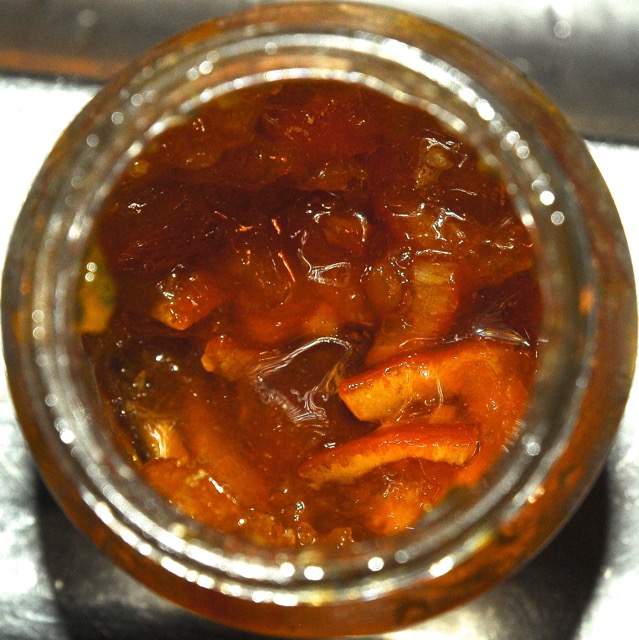
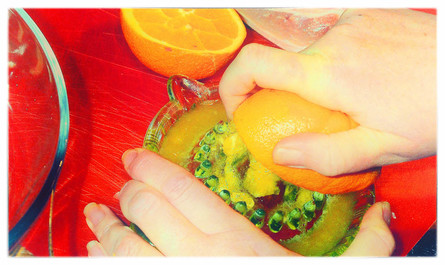
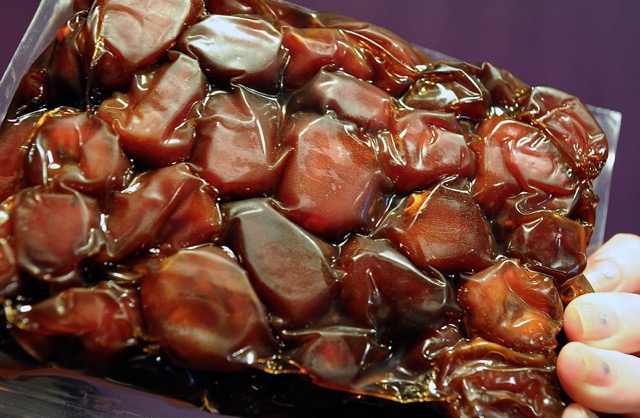
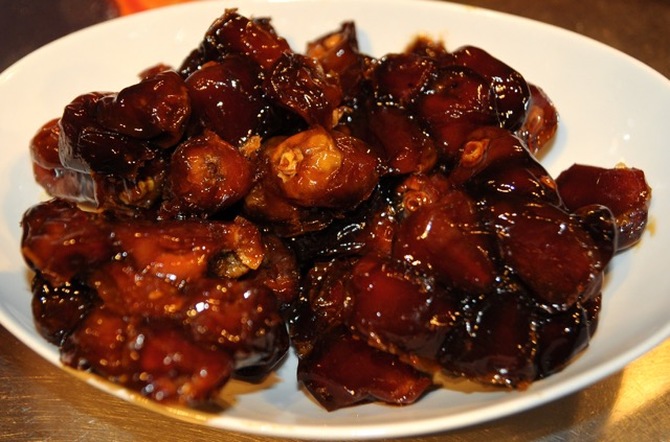
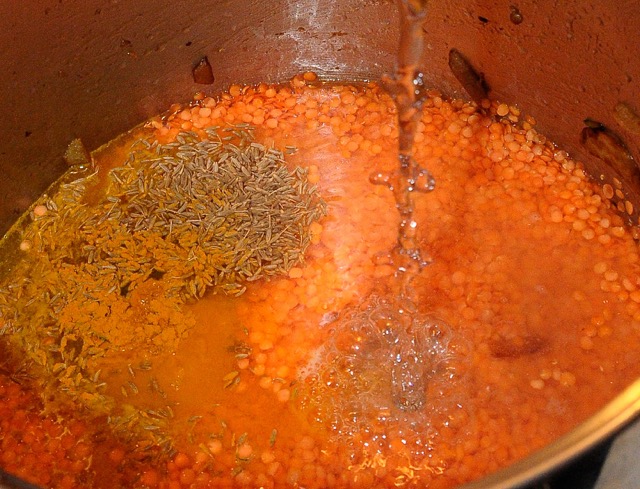
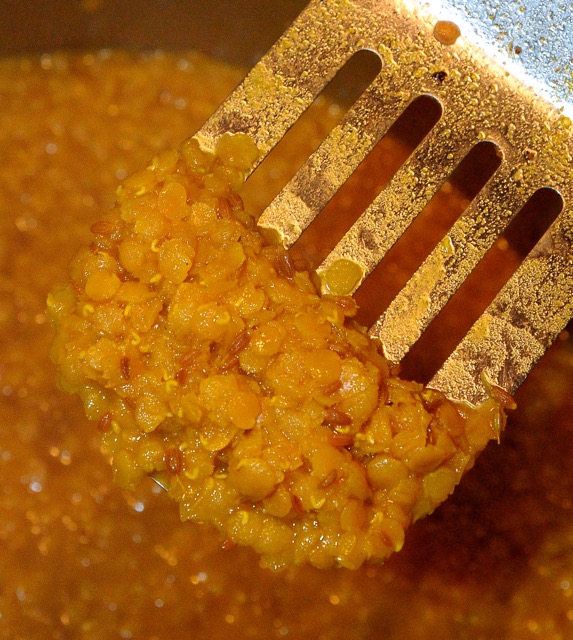
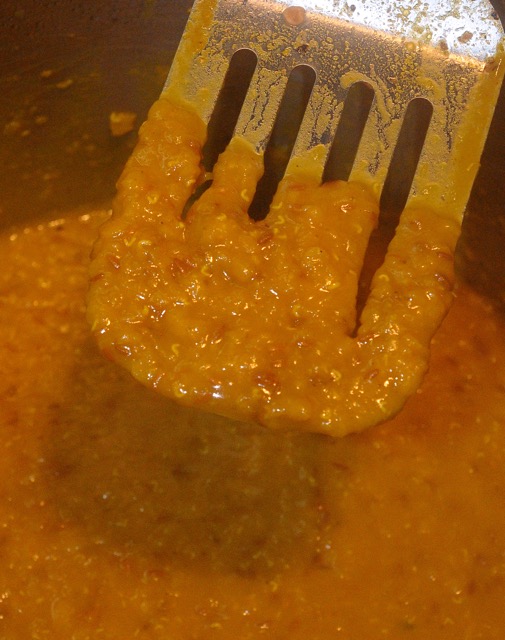
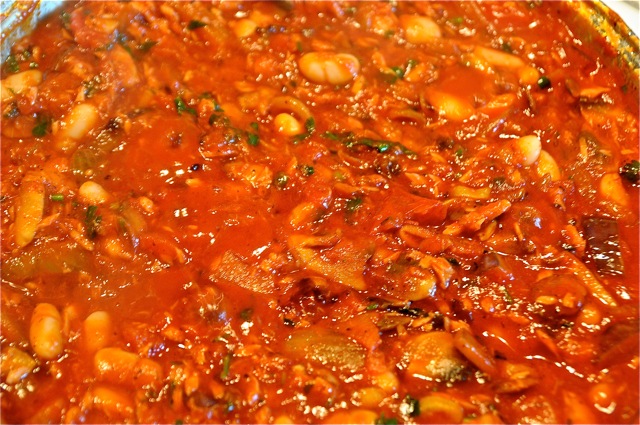
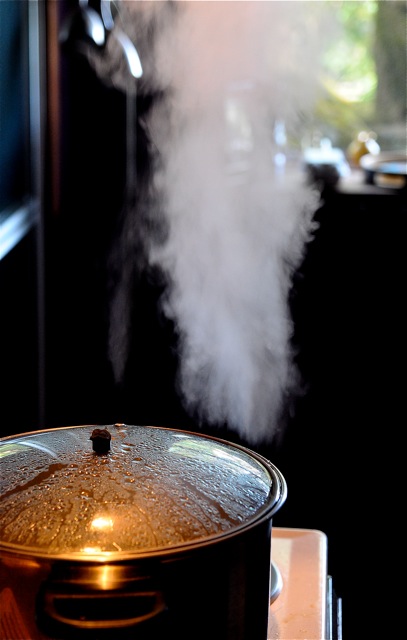
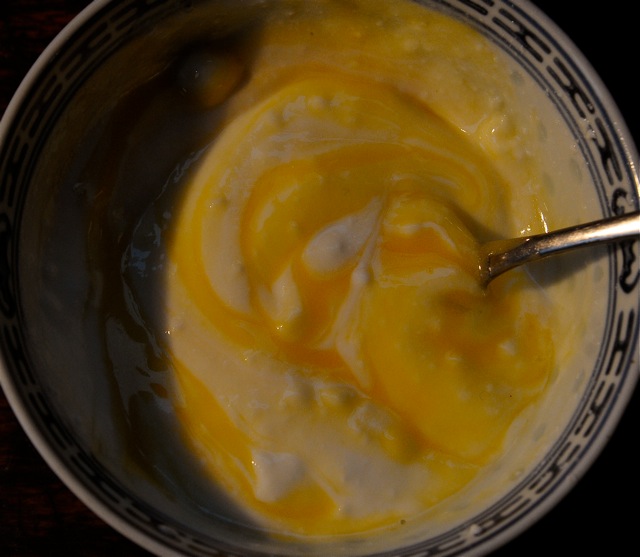
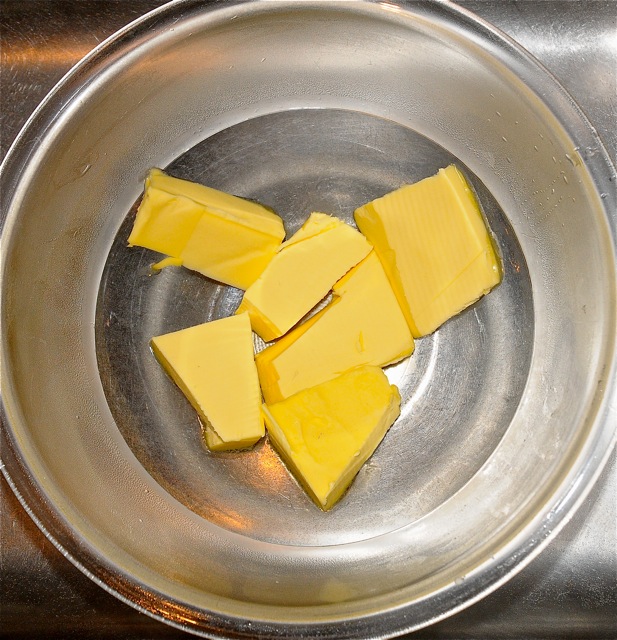
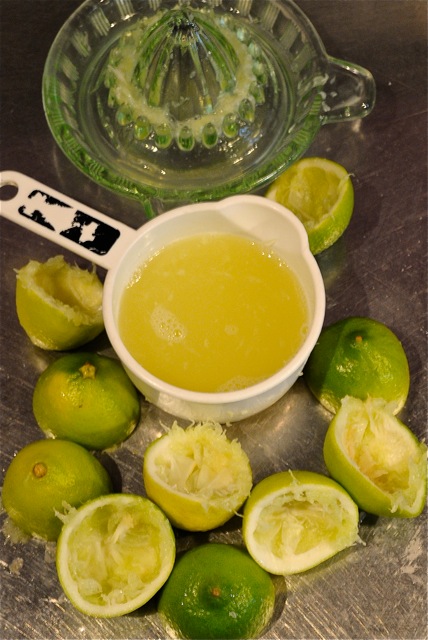
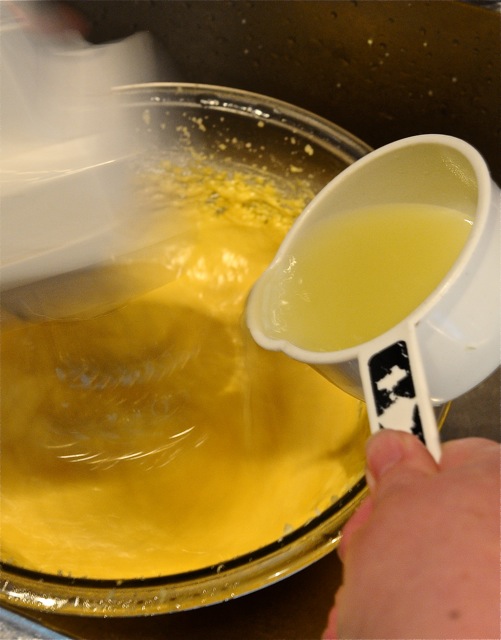
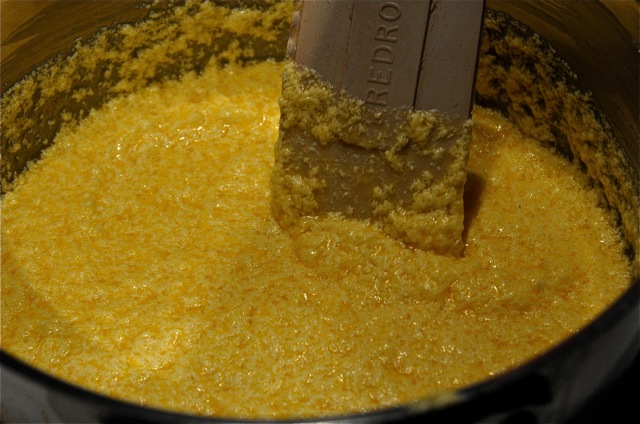
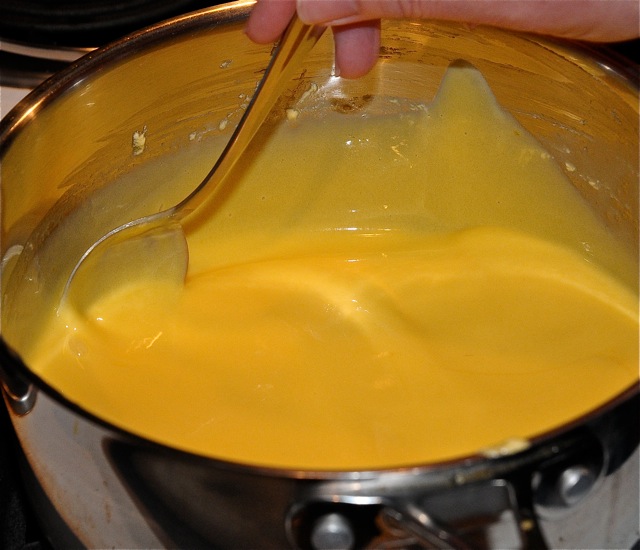
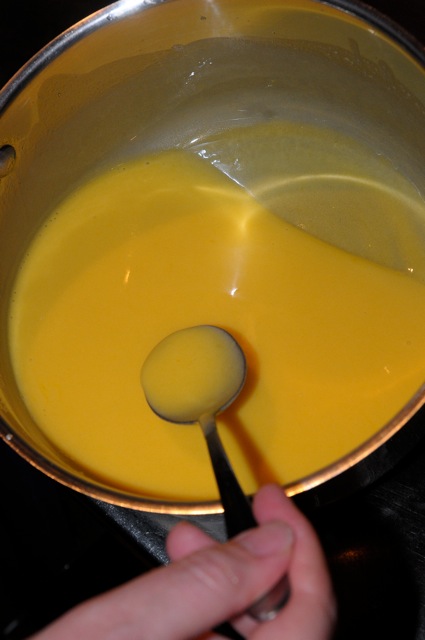
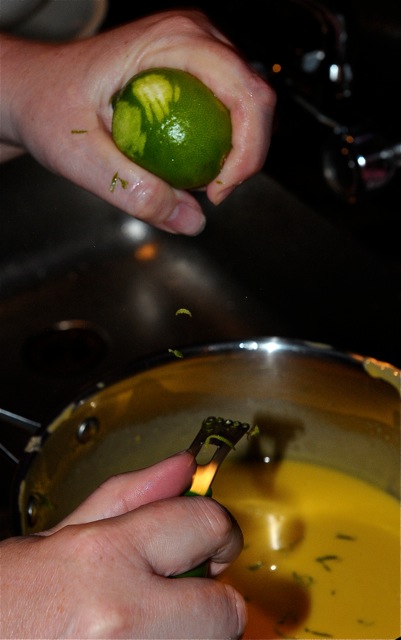
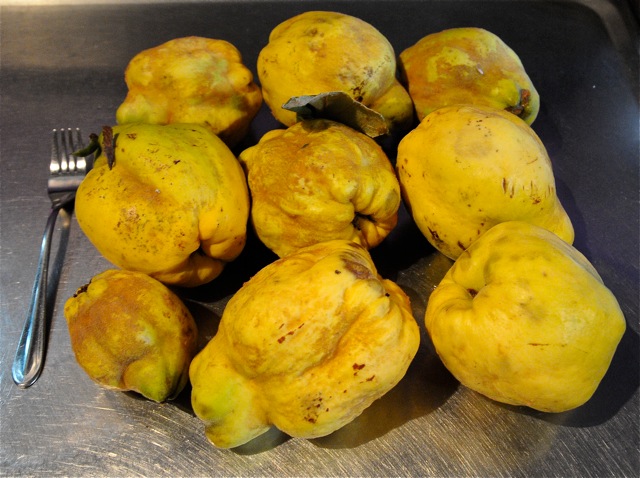
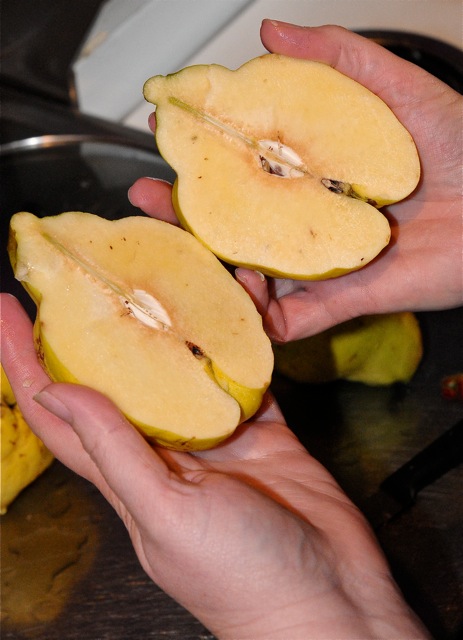
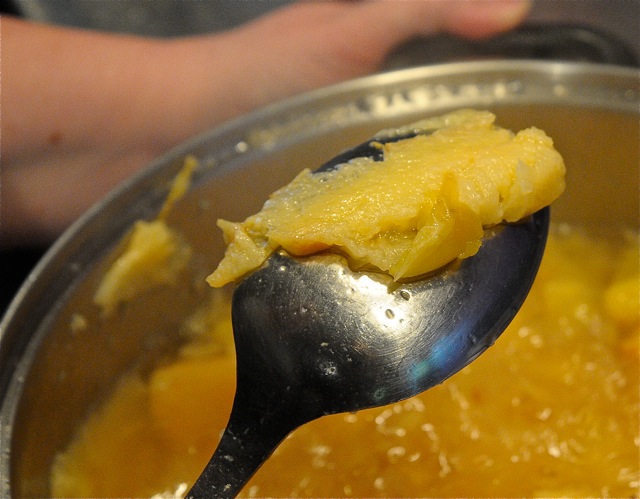
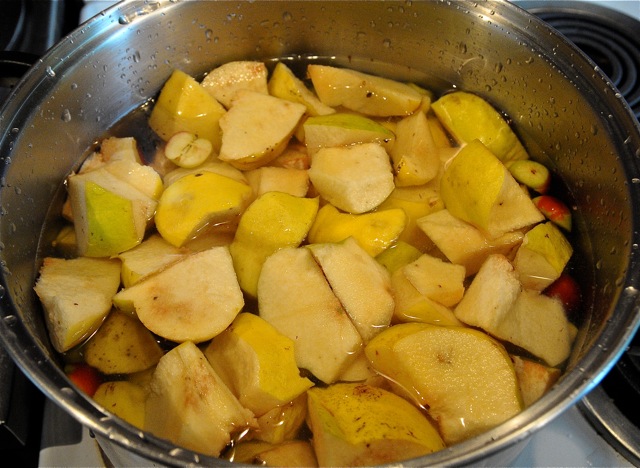
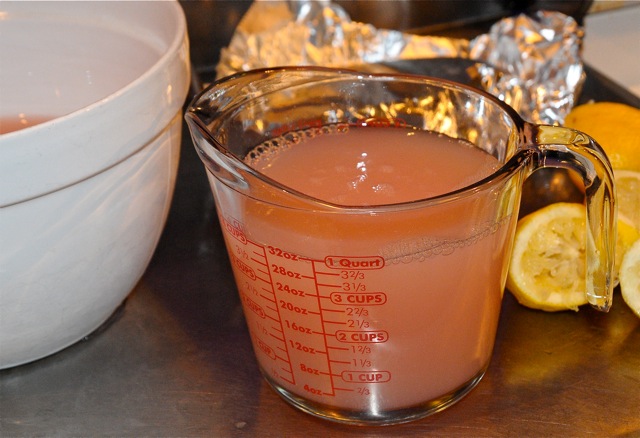
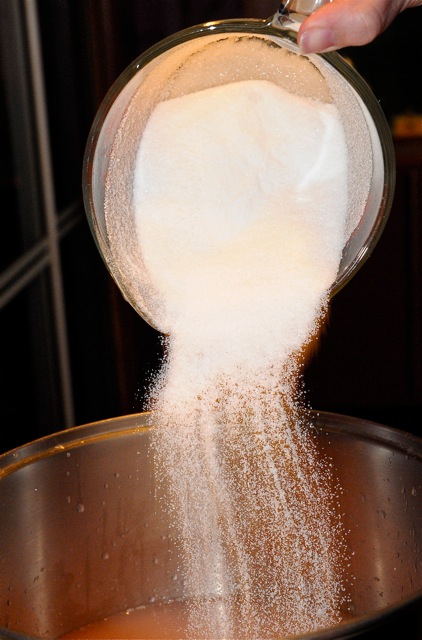
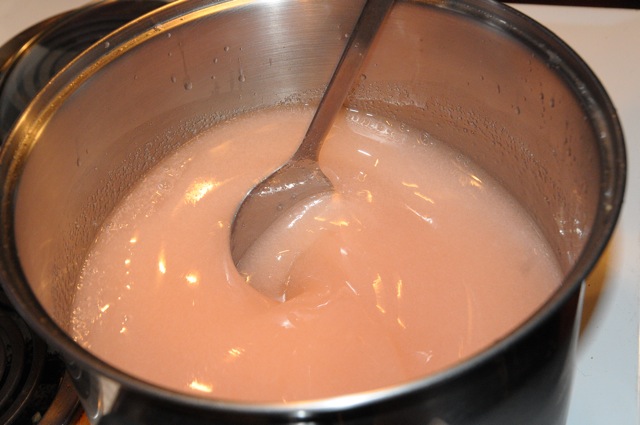
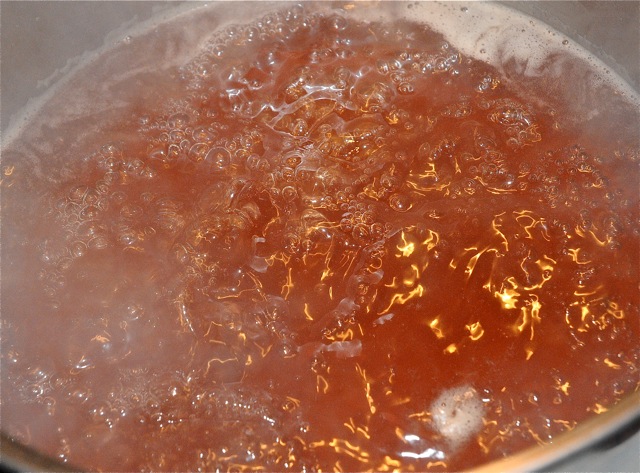
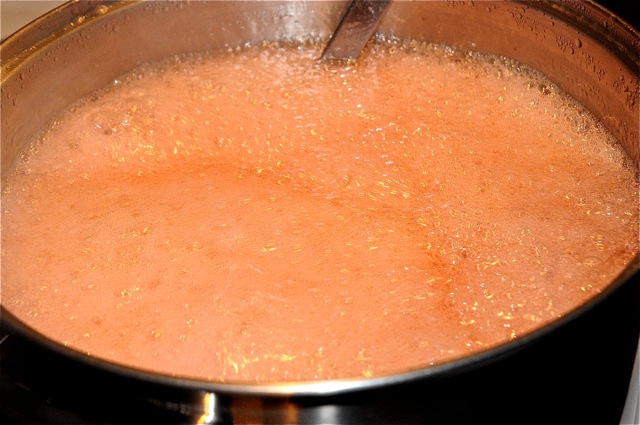
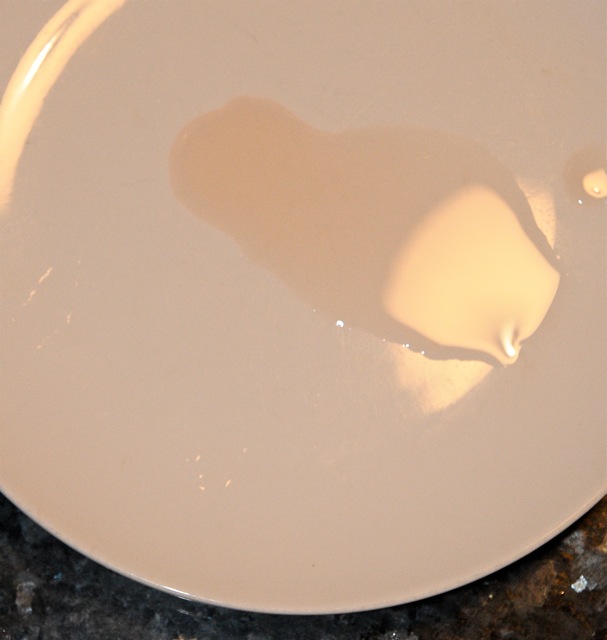
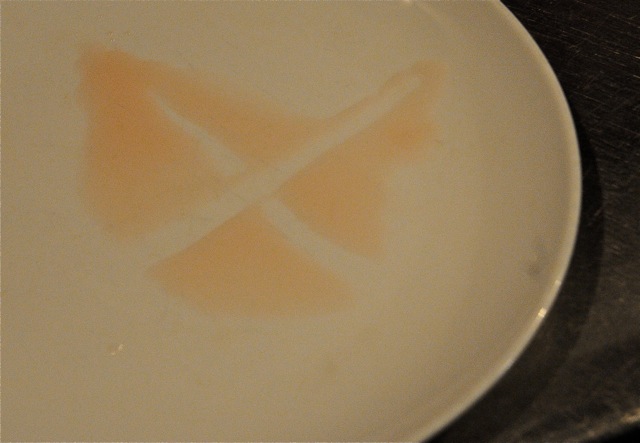
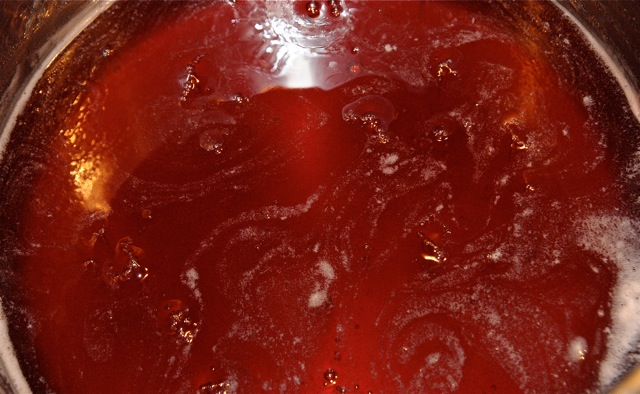
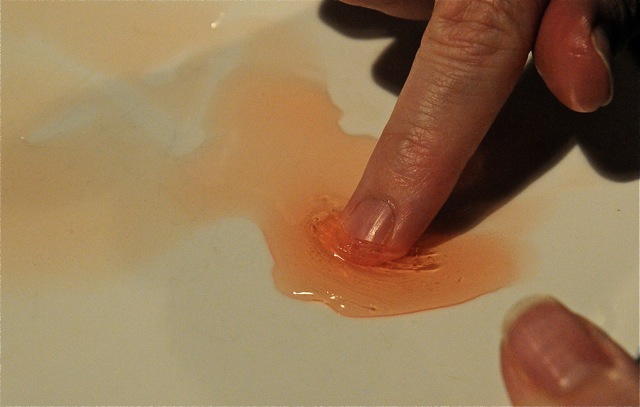
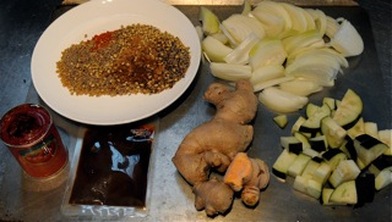
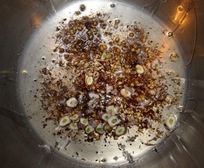
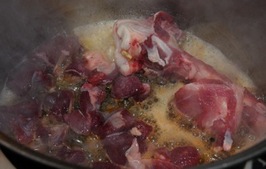
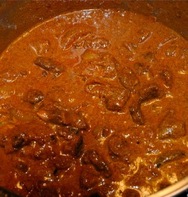
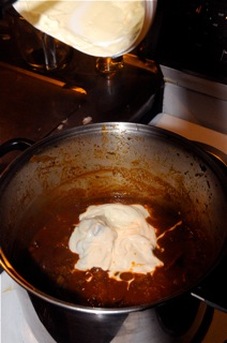
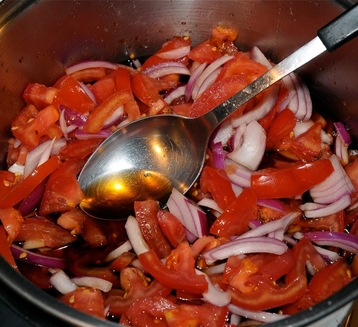
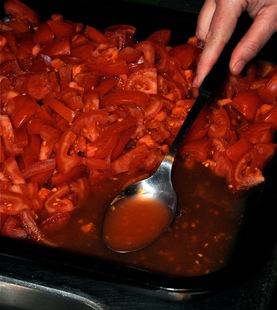
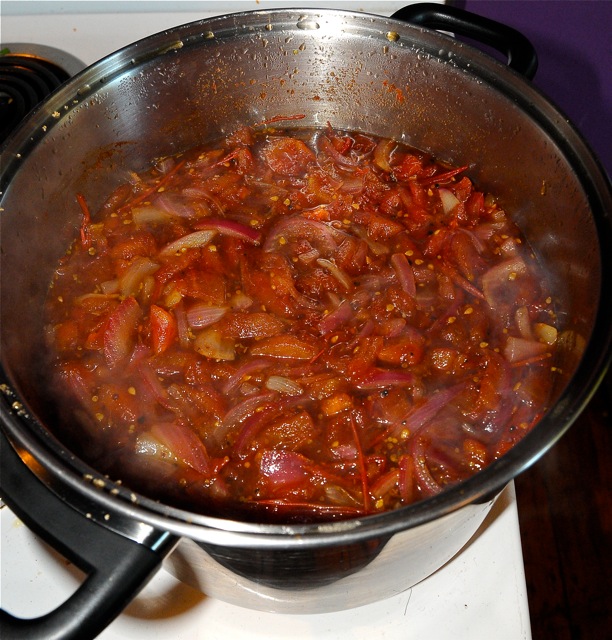
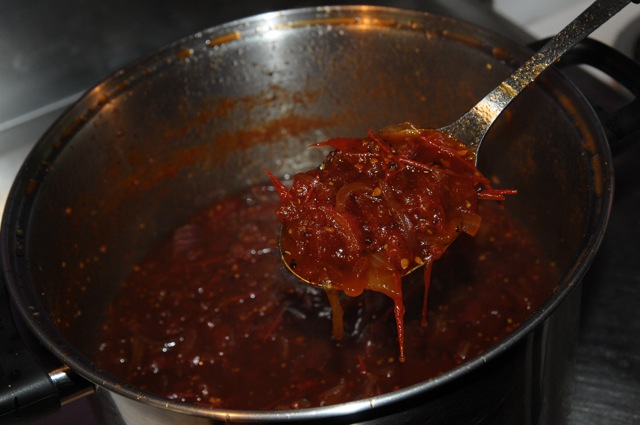
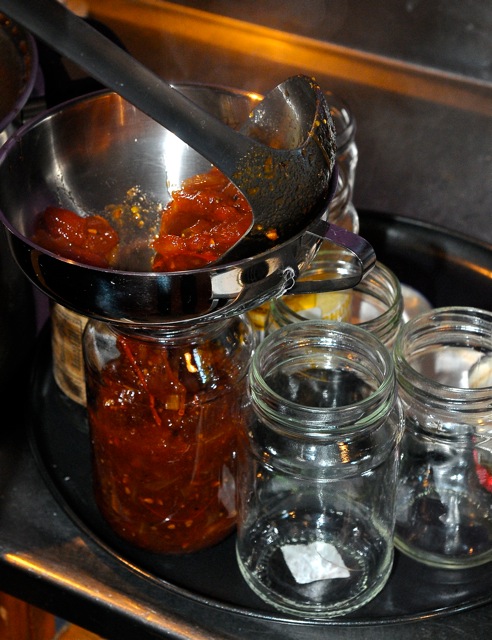
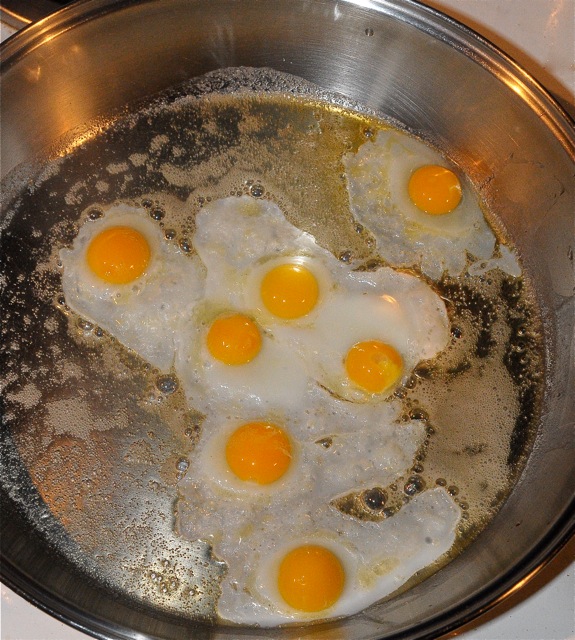
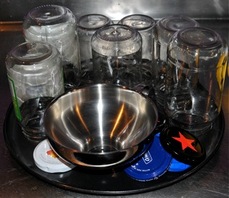
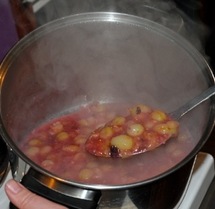
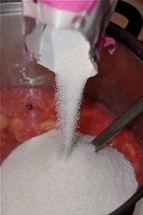
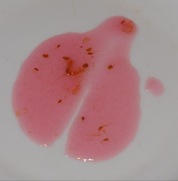
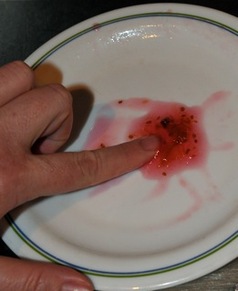
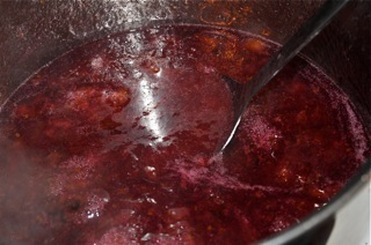
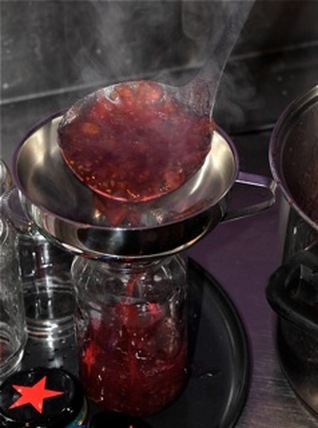
Choose relatively unblemished oranges if you're concerned about aesthetics, as the skin is visible in the final result.  It's not crucial, though, and you're better off sourcing wonky organic fruit sans the weird waxy crap some produce is dipped in these days to extend shelf life.
 
The only remotely special item needed for this recipe is a big fuck-off cooking pot that can take twelve large oranges and 3kg of sugar.  The one I use is about 24cm across and 20 high, and it's still a bit inadequate, really; get a bigger one if you can.

You don't need to be anal about the quantities.  Just don't use too much water or your pulp will take too long to boil down and I actually think 3L is probably more optimal than the amount quoted. The ginger quotient is up to you; we like lots and use a whole large-ish hunk of it.  Leave it out altogether if you're not into it.
​
Please note that this recipe calls for overnight soaking of combined fruit.  You can probably cut this down to a long afternoon if pressed.  As a general principle, I suggest it's better to be organised and righteous than sloppy when it comes to making preserves.  Botulism loves poor impulse control.
Picture
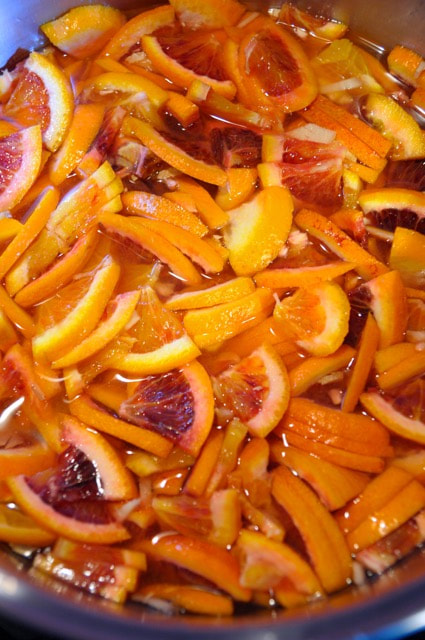
Juice the lemons.  Chuck the juice, oranges, ginger and water into the cooking pot as per above pic and leave covered in a cool room or fridge overnight.

The next day, bring the fruit and water mix to the boil and keep it going at a lively roll for around 40 min.  See how the pot at right is too small?  Don't do that; jam burns from overflows and spatters suck dog's balls.

Remove from heat, add the sugar slowly and mix very well, keeping it off the bottom.  Anything stuck there will burn horribly and ruin the jam. 
Picture
Picture
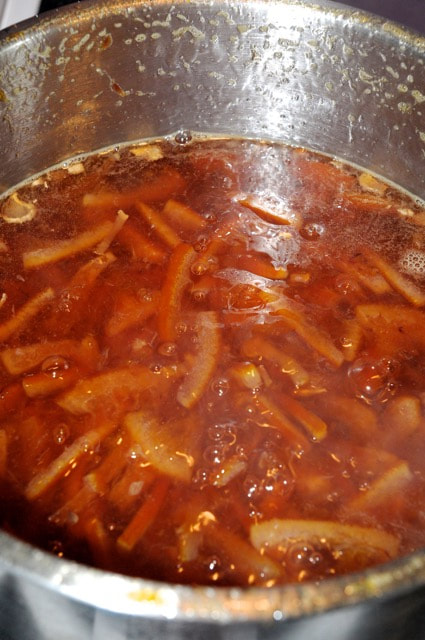
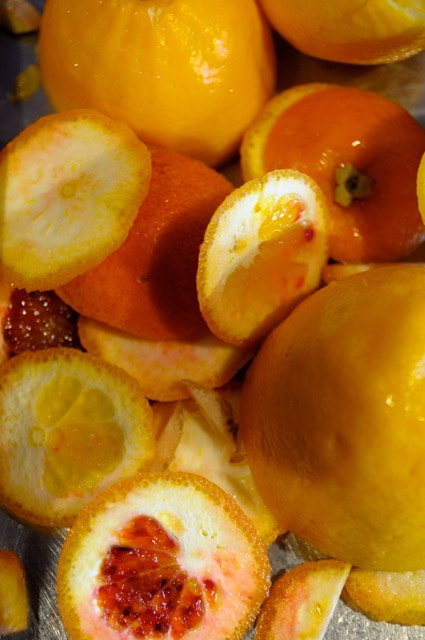
INGREDIENTS

12 large oranges (blood, or whatever)
3 huge or 4 medium lemons
1 medium stick of fresh root ginger
3 kilos of white sugar

3.5 L water
8-10 medium/large jars
​

METHODOLOGY
​

​Rigorously clean all the fruit, ginger included.  No need to peel the latter unless you're one of those people.  

Look the oranges over for soft spots, nasty bits and mould; don't waste the whole fruit, just cut a wide margin around these blemishes.  I top and tail the oranges to eliminate annoying thick pieces in the final result but that's up to you.

​Cut all oranges in half, then half again and then into narrow strips, remembering the final thickness of rind will persist in the result, so think about the dimensions you prefer.  Slice the ginger down to whatever thickness pleases you. 
Picture
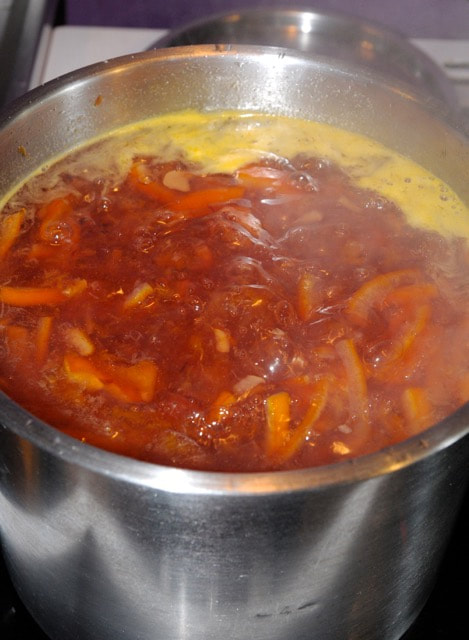
Return to heat and stir fairly regularly to make sure everything's dissolved.  Keep it on a medium boil for another 40-60 min until it reduces to around two thirds (as per left pic) and starts bunching on the spoon and cool-setting.  You might need or prefer to boil for longer depending on how thick and sticky you like the jam; I prefer runny, so come out at around 50 min.  (The jam will set further in the fridge once opened so don't panic).

Importantly, you should let this jam rest in the pan, off heat, for around 10 mins to cool before filling your jars, so the orange pieces don't all float to the top- I was a bit impatient and you can see it in pic below.
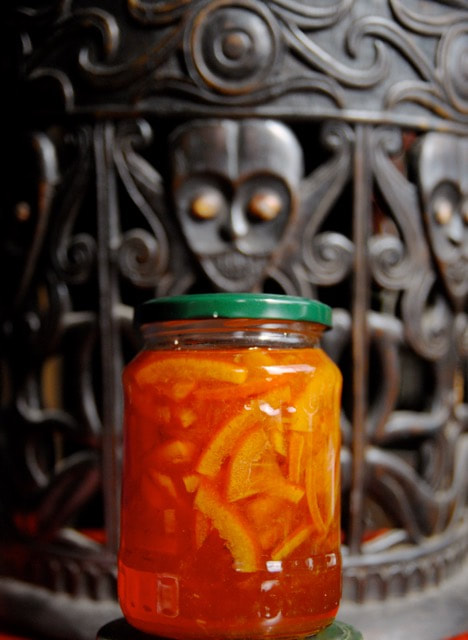
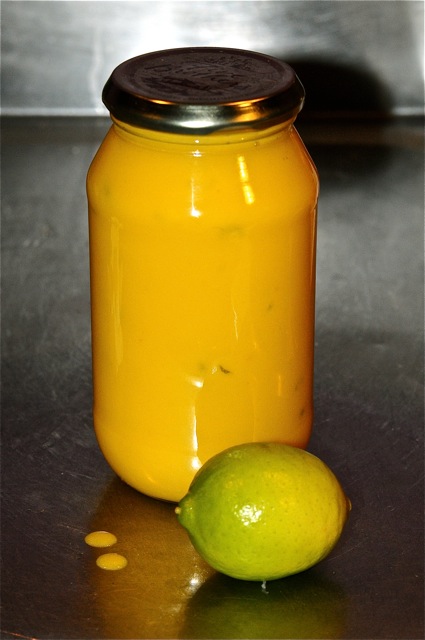
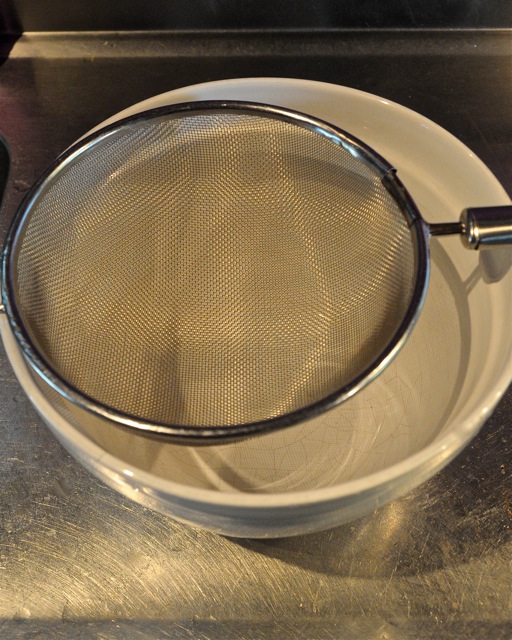
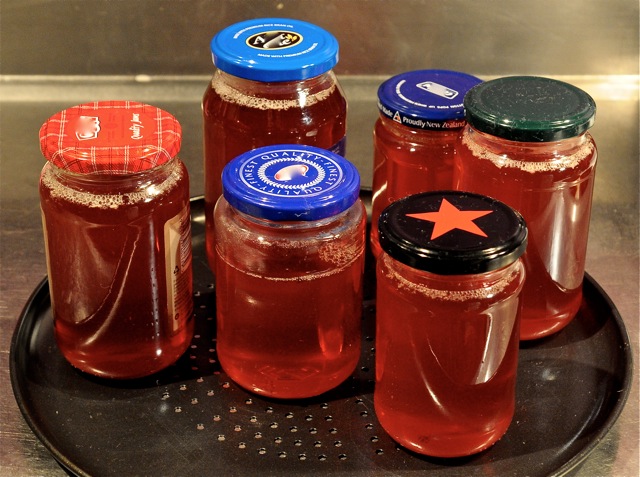
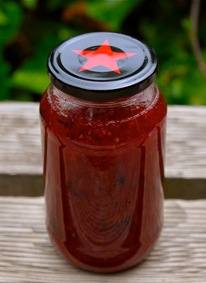
Use a sterilised ladle and/or jam funnel (just buy one goddamit) to get it into oven-sterilised jars (100 celsius for at least 10 mins including lids).  I filled 9 medium to large jars here but it varies every time, so clean more than you think you'll need.  

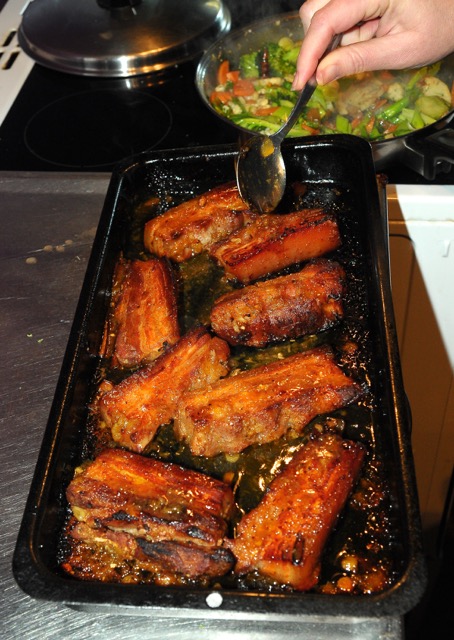
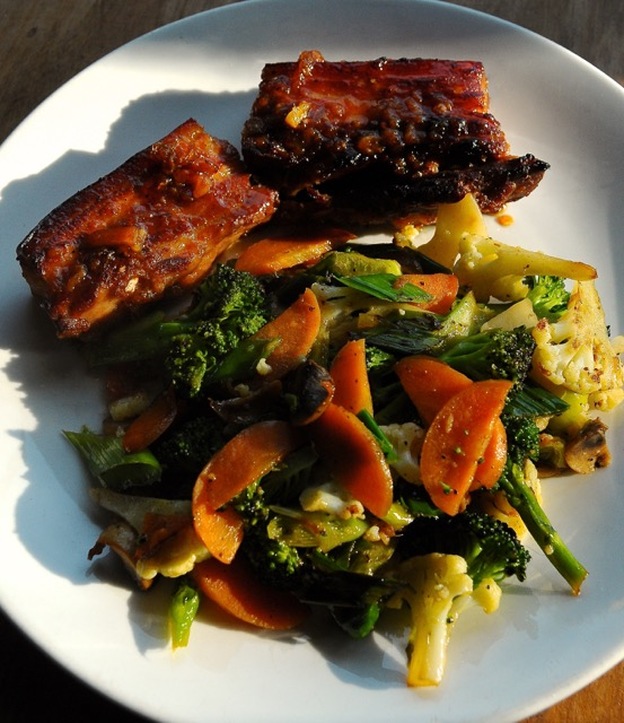
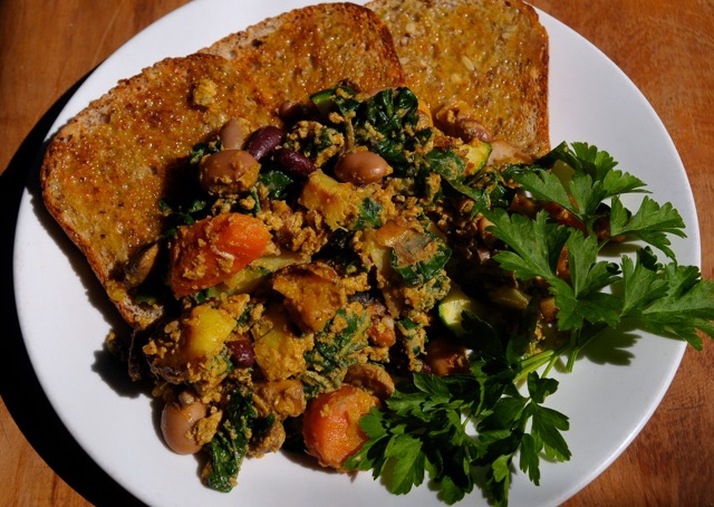
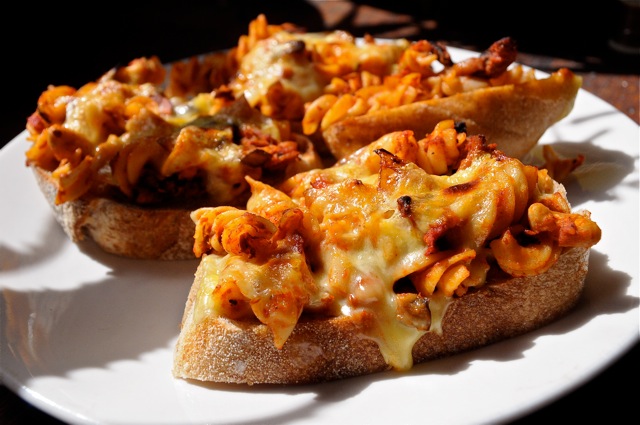
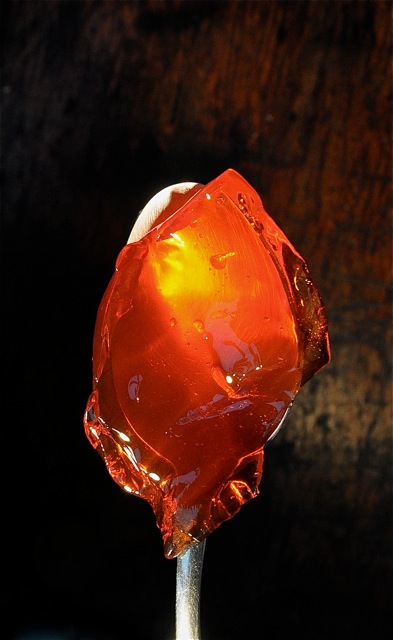
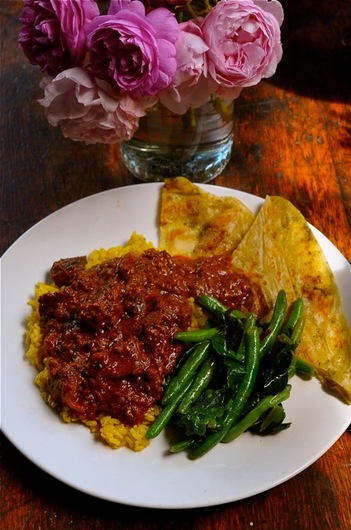
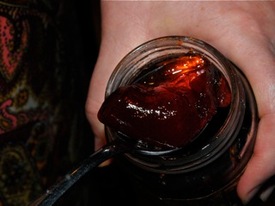
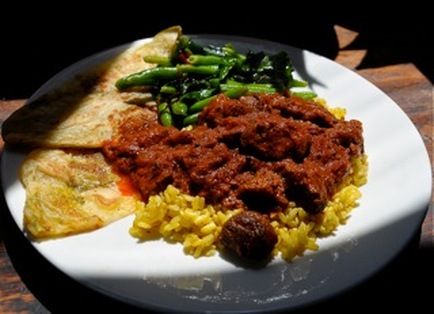
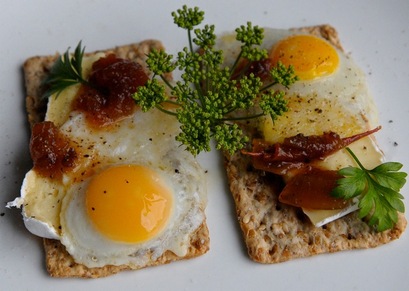
​Mine still slops around in the jar after a notional set, but you can boil it down to rubbery firmness; while I personally think this is gross, you're the one eating it.  We like to spoon it out and let the syrup soak into the toast while the fruit sits on top, smiling at you.  Refrigerate once opened.  Use liberally in 
poultry recipes, sauces and on cakes, too.
Picture

*   More Kitchen Bitch, bitches   *


Happy Halloween

31/10/2018

 
Picture
Chaos reigns here in the Blackthorn kitchen on this most sacred of nights.  Whilst rain
​swept any soliciting children back to their homes, we macerated our intellects
with Resident Evil and stuffed our gullets with unsightly profiteroles laden
​with home made ganache and passionfruit cream.  I am lactose intolerant and not too
good with grain starch
 either but life is a mystery to be lived, not a problem to be solved.
These are the ghosts of profiteroles past now.

Halloween is our anniversary.  26 fucking years in close proximity is a long time not be
stabbing each ​other with whatever comes to hand.  I have learned a few important
things about relationships: there are no soul mates, just the people you choose to
be with.  Good will is everything.  Apathy will sour empathy.  No one really emphasises
boring shit like this, but they are the pillars of enduring regard.
Just thought I should pass that on.

Have a good time tonight or whenever you're celebrating.  It's the start of summer for us
so there are no fucking pumpkins.  Only flowers.


Picture

Photos du Jour: Random Currants for Misc. Jam

24/12/2017

 
Picture
We picked three kg of gooseberries and got a shittonne of jam from that, then R decided to go crazy and pick the other currants, which we usually leave for the birds because laziness.  The hot month before xmas has turned them into something worth bothering about so we rounded up every remaining Ribes for committal to jars.

​Thought you might like to see them since they are so beautiful.
Picture
Picture
Picture

Kitchen Bitch: Moroccan-style Vegetable Stew with Fish

21/9/2016

 
Picture
Picture
We swapped alcohol for puff a couple of years back, so we don't get hangovers anymore and I'm one of those freaks who never suffered them anyway. We do feel seedy as hell, though, sitting in a dingy carb-hole after all that Friday/Saturday off-wagon surfeiting. This is a swift and virtuous one-pot, no-fail dish that allows you to shirk doing the dishes and makes all those adult-themed weekend mistakes seem like a distant blur.

The حَسن جِدا in this (loosely) Moroccan-style stew flows from the pungent, garlic-laden savour of my home-made harissa spice paste and the hefty dose of lemon juice consigned to its tomato liquor.  The flavours are bright and punchy without offering undue challenge to any already harrowed sensibilities.  
I think of it as a restorative tonic, really; there's nothing better when you're cold, low, sick or run down.
​

The foundational vegetables make this stew both nourishing and relatively easy to digest, so it's a great relief for the bloated and liverish.  We have mixed vegetable fortunes here in New Zealand; our zucchinis, onions, garlic, lemons and cauliflower are great, generally speaking; the eggplants are m'kay but our commercial maincrop tomatoes are usually shite.  So while this dish might look hopelessly seasonal, we end up making it for most of the year thanks to the cheaty magic of tinned tomatoes and home-grown frozen zucchinis.  I love the superior and persistent texture of the old ribbed varieties like Costata Romansesco; after four months sliced in the freezer they're still a thousand times better than the overpriced winter supermarket version.  If you really can't get hold of some decent firm zucchini you could perhaps try one of the blander dry pumpkins as a replacement.  
Picture
Clean flavours and distinct textures are a big part of this dish's appeal and it's important to avoid overcooking the vegetables, especially before adding the tomato and fish.  You want a wee bit of bite left in the cauliflower and onion.  I use frozen chickpeas that I've cooked up at home rather than the tinned jobs but if the latter is all you have, add them toward the end to prevent their disintegration.
If you're too fucking lazy to make your own harissa either substitute a commercial version or just throw in a teaspoon each of the following: whole cumin, whole coriander, salt, chopped/mashed garlic with fresh or dried chili to taste.  While we personally find the lemon indispensable we have been caught short and forced to continue on without it; the results were perfectly edible, so you can theoretically eliminate this flavour if you're not a fan.
​
This stew makes the most of cheaper fish species like Monkfish, Moki, Red Cod or any similar MOR white variety; Mackerel is great too.  We've got Gurnard today since it was on special.  It's also delicious with chunks of leftover roast lamb or mutton (add some lamb fat if you've got it), leftover meatballs or either plain or Moroccan-style sausages.  Make sure you add the cooked meat at the end and allow sufficient time for it to heat through in the stew.  

The recipe serves two adults.  By a
 handful of the chopped vegetables, I mean roughly one cup, but precision isn't really important.  Cube the veg into largish chunks rather than thin slices.  Poach a couple of eggs in the stew in lieu of meat for a vegetarian version.  You could even toss in a couple of shelled hard boiled eggs at the end for a protein hit.
WHAT YOU NEED
- 2 small-medium fillets of your preferred fish (or as many eggs as you like if vegetarian)
- Handful of chopped cauliflower
- Handful of chopped eggplant
- Handful of chickpeas
- Handful of sliced zucchini
​
- Half a large onion
- 1 big lemon (or a half, depending on your pref)
- Good Tablespoon Harissa paste
- Olive Oil + a bit of butter if you're inclined
- 1 400-ish gram tin of chopped tomatoes in juice.
- Salt + pepper to taste (if you must)
Picture
Picture
Picture
Bring the olive oil and a knob (lol) of butter to a medium-high heat in a saucepan and briefly fry a bit of the harissa before adding the onion and eggplant together.  You want to keep the taste clean so fight any instinct to hard brown them.  A gentle sauté is all we need.
Picture
Picture
Once they're softened up, throw in the cauliflower, then the zucchini and chickpeas.  (Just chuck the cauli and zuc in together if you're using fresh vegetables, but save the chickpeas til last if they're canned).  Break up any frozen clumps and keep it all moving over a brisk high heat to prevent the watery sogs setting in.  Once it's starting to lose that raw virgin crispness, add the rest of the harissa and stir well.
Picture
Picture
Add the whole tin of tomatoes at this point, then juice either a whole or half a lemon and add both to the pot.  Serious citrus loons can add some preserved lemon too or reserve the juice and add it right at the end for a higher, brighter uncooked lemon kick.
Bring to the boil and let it go for about 2 minutes. Watch it closely; you just want everything acquainted at this point rather than disintegrating into an indistinguishable Brundlefly mash.
Picture
You can chop the fish into chunks if it's gobby (i.e. Monkfish) rather than flaky, but Gurnard will come apart nicely so we place the fillets in poaching position on top of the stew and spoon some over them.  Keep the heat high very briefly (about a minute) then turn it off (in the case of ceramic tops) or go low (for gas) and let the whole lot simmer with the lid on.  Don't be tempted to poke or fuck around with it; leave the damn fish alone.  If you're using leftover cooked meat, you just want to bring it up to a safe temperature- don't boil the shit out of it.  Vegetarians: keep the heat a little bit higher and drop a couple of eggs into wells in the stew at this point- poach them to your desired texture.
Picture
Picture
Another five minutes should be all you need.  When you think the fish is cooked, have a wee dig into a thick piece to make sure, then take it off any residual heat and let it rest for a few minutes.  You can dress it with some more olive oil at this point if you like.

Be a bit careful plating up- the chunks of fish can fall apart in an awkward manner halfway between saucepan and bowl.  I don't find it needs extra salt most of the time so you might want to have a few spoonfuls before seasoning too liberally.

We have gently reheated the occasional leftover portion and the results were perfectly acceptable.  Spoon it over some medium-grain rice or pearl-style couscous if you want it to go further; this amount could feed four.
Picture
Picture

*   More Kitchen Bitch   *   Hostile Witness Film Review   *   Photoessays   *


Kitchen Bitch: Tonka Beans

27/7/2016

 
Picture
​Tonka beans.  Fruit of the leguminous Cumaru tree (Dipteryx odorata), native to Central America and also exploited for its beautiful timber.  They look like wizened troll nuts but I won't hold that against them.  Tonka is familiar to most perfume fanatics and the note features heavily in the whacky Orientals I tend to favour (Serge Lutens et al), so it wasn't exactly a stranger when I unscrewed the bottle I received the other day.  

​The scent in its raw form bothered the shit out of me with another, more elusive association until I remembered the infernal mellow savour of roll-your-own fags and confirmed via the Wiki page that tonka is heavily employed by the tobacco industry.
Picture
I broke out my jar of Tongan vanilla pods and performed a side-by-side comparison.  ​
Picture
Next to tonka, raw vanilla is a much higher, narrower note, more exclusively of itself, silver-clean, far more densely floral (like a waxy wad of compacted orchid flowers) and possessing that odd, dusty, astringent tang that is really only faintly caramel.  

If my island pods are pretty pungent on the vanilla scale, tonka is easily twice as strong, with a huge, low, malty punch (like bagged horse feed), notes of molasses, sweet wood shavings, wet grain and distant pouch tobacco.  There's something else in there too- I get scuffed black and realise it's the smell of vanilla pod skin, bruised and scraped of its seeds by a knife, that faint leathery note that is quite independent of its haughty floral payload.  
It's in those darker corners that their alleged relationship lies because their similarities are otherwise tenuous during real-time comparison.  They both suggest sweet but that's facile association rather than accurate characterisation.

​Tonka is touted as a vanilla replacement and while you probably can switch one for the other in most recipes, medium to high-functioning palates should brace themselves for what possibly constitutes prohibitive difference.  I grated a third of a bean into oven-top hot chocolates; the result was loud, malty and well, tonka rather than vanilla and the grated shavings, though fine, were a persistent presence.  The overall effect is far less subtle and elevated than pod vanilla and probably most suited to those robust dishes involving caramel and Asian flavours.
Picture
Tonka would be great in heavy cakes, sticky date iterations (there's a definite date affinity now that I think about it), my orange and ginger pork belly and syrups for Malaysian sago pudding, for example- anywhere that fat, slutty caramel is already on the cards.  Which is why I'd hesitate to include western milk-based desserts in that substitutive laissez-alter; their flavour profiles are too sheer and precious.  A panna cotta made with tonka is going to be a pretty different beast to the trad vanilla pod version.

​So to cut a lot of wank short, tonka is nice but not really a vanilla analogue and its distinct properties deserve their own consideration.

​Below left: a third of a large bean's worth of grated shavings.​ Right: 15g of tonka beans.
Picture
Picture

*   More Kitchen Bitch- recipes and raw ingredients   *


Kitchen Bitch: Orange and Ginger Pork Belly

30/6/2016

 
Picture
Pork belly sounds all exotic and difficult, but it's just pre-bacon, really, the side of a pig before all the salting and curing and slicing.  Formerly cheap and cheerful, belly is latterly victim of bandwagoning foodie attention and therefore increasingly expensive; I paid $20 NZ for this 1 kilo free range piece, which will feed two people for two days. That doesn't sound particularly thrifty but we're being greedy; you can chop up leftover belly and add it to stirfry vegetables and broths etc to make it go further.

If you're going to eat meat, please consider opting exclusively for free-range product.  I know it's more expensive but I promise that your budget and expectations will adapt.

Below: this is a nice balanced piece of free-range pork belly.  Balanced as in displaying an even ratio of fat to meat.  Some belly is all one without the other, and that's not optimal.
Picture
I had the butcher bone this piece, which I highly recommend as it reduces the weight considerably and bones are a pain in the arse.  The slightly creepy pale substance you can see on the right there is the skin of the pig, singed of hair; this sort of marinated pork belly doesn't really rely on crispy skin although you can achieve it if you wish, so feel free to trim it away (being careful to retain the underlying fat) if you're not keen.  It softens and becomes delicious in the pan anyway.

Not every piece of belly is going to be meltingly tender and there's not a tremendous amount you can do about that.  Marinade usually helps but I think its ability to break down gnarly meat grain is vastly overstated.  Lower your oven temp and extend the initial cooking time if you've got a bit of home-kill that you think will need extra attention.
Picture
Picture
My version of this dish happens overnight and in the oven, but you can cut down marinating time to about 4 hours in a pinch.  Some people want to go batshit with the sweetness element; I find that too much with the fatty richness of the pork and prefer to favour the orange/citrus angle, hence the all-important orange jam or marmalade.  While you really do need one or the other for the ultimate experience, just the juice provides a perfectly nice alternative if you ramp up the honey etc. and concentrate on sticky sweetness.

The marinade is endlessly adaptable in all honesty.  You can add anything from the Asian flavour pantheon that tickles your particular fancy.  I chuck in dates, fennel seeds, star anise, golden syrup and gooseberry jam according to whatever's in the fridge and it's always good.  Crappy/inexperienced cook?  Look no further than this ultra-reliable, unfuckupable recipe.  Sounds exciting, tastes delicious, requires virtually no culinary skill.  If you can use a grater you can do this.
WHAT YOU NEED
 Ingredients are approx and negotiable (except the orange)
- Around 1 kg free range pork belly, boned.
- 2 oranges or 4 mandarins
- Decent piece of fresh ginger (or dried)
- A bit of stick cinnamon
- Few cloves garlic
- Slosh of chicken or vegetable stock
- Asian sauce: today it's Black Bean
- Big blob of honey or golden syrup etc.
- Big glob of orange jam or marmalade, or leave out and replace with more honey.
- Few shakes of sesame oil
- Black pepper and salt to taste
- Rice bran oil or butter or any neutral fat
Picture
That honey will resist emulsification unless it's super-runny so you'll have to do a bit of mixing.  Just get it so it's more or less involved in the liquid.  
Picture
​Have I shared my orange and ginger jam recipe?  Dude.  You'll love it.
Picture
Now add about a half to a whole cup of chicken stock, depending on how much liquid you feel you'll need to achieve decent meat coverage.  In this bowl, I'd say that's about three good cups all up?  It's not crucial.
Picture
Place the meat in the glass bowl and press down so that the belly strips are as covered as much as is humanly possible.  If you're short of liquid, squeeze another orange into it or throw in another dash of stock.  

​Cover and refrigerate overnight.
Picture
Picture
You want a nice big covered glass bowl for the marinade but it's not going in the oven so it doesn't have to be Pyrex etc.
​
Squeeze the oranges or mandarins and add to the bowl along with pulp if you wish (I find it adds flavour and texture).  Then finely grate up about a fat tablespoon of fresh ginger and chuck it in along with the chopped garlic, cinnamon, honey, jam, sauces, seasonings and sesame oil.
Picture
Picture
Picture
You'll need your best sharp knife to get through the belly cleanly.  Slice it, skin-up, first in half then keep going until you've got more or less even strips.  Not too thin, or they'll dry out.  Not too thick, or they'll have a boring glaze-to-interior ratio.  You can see what I've done here- they're about two fingers wide, which is cool.

​ They'll shrink a bit, end to end.
Picture
Okay so it's the next day and we're cooking.  Set the oven to about 180-200 ºC of conventional, non-fan heat.  Find yourself a relatively flattish baking dish that won't be affected by the acidic marinade i.e. not aluminium la la la.  Lay the pork strips out on their sides, pour the marinade over, add around a tablespoon of butter or oil and cover with foil or a lid but don't hermetically seal the shit out of it; you want some steam to be able to escape.

​When the oven's up to heat, put the pork on the lowest shelf and turn down to between 150-180 ºC depending on how mad your elements tend to be.  You want medium-high heat for around 45 mins for this amount of meat, a little less for a smaller batch.  You know the drill.
Picture
Picture
After around 45 mins, take meat out, discard the foil and spoon some of the marinade over the strips.  They're pretty much cooked now, so the next step is browning them up.  Arrange them so they're not too crowded against each other.  Turn your oven up to around 200º C again, higher if it's a slow bitch, preferably on fanbake but you can grill on a high setting too.  Whatever gives you maximum sizzle action.
You'll have to watch the meat carefully from now on. Turn your back one too many times and you'll have a carbonised catastrophe and a pan you might as well throw away.

While the belly's colouring up, get your veggies ready; we're having stir fry so I've got that on the stove top.  After about 10 mins on blast, turn the strips over and dress them again with the juice.  I like to add some marinade to the vegetables but do make sure it's cooked through since it was in contact with raw meat.  The pork should be well browned after about 10 mins on each side.  Don't go too nutty with that process and take the meat out to check because oven lights tend to downplay how black shit is getting.  I don't care about getting the skin crisped; you can turn it up toward the heat at the end if that's your thing.

Turn the oven off and let the belly strips rest in their juice for 10 mins and then serve.  Everyone will love you.  They're good the next day too- save some juice to keep them moist during reheating.  
Picture
If you'd like to make the meat go further in a formal setting, slice the cooked strips across the grain to plate up; you can get away with one strip per person plus vegetables.👹
Picture

*   More Kitchen Bitch   *   Hostile Witness Film Review   *   Selected Ravings   *


Monday slash Tuesday slash what's the opposite of Brexit slash hard-hitting vacuum-packed date investigation

27/6/2016

 
Picture
The opposite of England ​leaving the European union is cooking ginger and orange pork belly at home.  That has been scientifically quantilionified, so that's what I'll be posting this week.  

I'm all out of thoughts about the Brexit, except that it's a fucking ugly portmanteau.  On one hand, I know the dipshits who voted
leave are a bunch of hooting xenophobic throwbacks and angry couch humpers who frankly stunned me by eschewing Sky Sport en mass, admittedly to vote for something they didn't understand which must have made them feel at home, I suppose.  On Team Remain we have the feckless dumbarses who base their favouring of international overlordship on St Vincent tweets and wanting to spend six months taking drugs and fucking hot foreigners on the Continent with minimal documentation, man.  

​We live in New Zealand and have enough problems of our own, so it was nice to sit this one out and just enjoy the fuckery while it's still a distant abstract.  On a personal level I hate most people, so part of me wants to sever all relations, deport everyone and lock the gate.  The other part wants Germans to pay for urban renewal projects, to enjoy liberal narcotic legislation and inexpensive cheese and fuck Spanish guys too; the conflict is real.  But we're all doomed either way so I don't worry too much about the deckchair shuffling.  

On a completely unrelated note we were in our favourite Indian grocery the other day.  It’s Ramadan and every observant date fancier in a 20km radius is freaking out about supply. We’re not observant but we were freaking out when the shop owner explained that the date boat was held up in bloody Wellington. ​ Fuck that lazy date boat right in the arse!

A week later and lo, the date fairy had been generous.  Her magic fruits were everywhere abundant; boxed, bagged, loose- we couldn't decide which ones to go for.  

​Then we saw these...  Al Khaleej dates.  From Jeddah.  Vacuum-packed.

​Mysterious.

Should we be supporting the Kingdom of Saudi Arabia with all its no-homo lady-shading vodka-hiding ways?  No. But the lure of the unknown vacuum packed date was ascendant. 
Picture
I bought them and the Iranian dates.  ​Maybe you're some sort of European or North African date-literate sophisticate but we're still at the basic stage of ourتمر journey and we had many questions.  Why are they like this?  What is that moisture?  Why vacuum packed? 

​There was no smell to guide me; for all I knew, we'd just dropped seven dollars on something that tasted like sock vinegar or spicy earwax.
Picture
I looked them up online and found something about their being recalled in Canada a few years ago due to their random insect content.  Ha ha!  You're not getting away that easily, mystery date.  If you've seen my kitchen, you know we thrive on random insect content.

​There is an Alkhaleej Date site but the server handshake between NZ and a lot of Middle Eastern content is like fucking treacle for some reason, so no dice. 
Having eaten all the conventional Iranian dates, we looked to the Al Khaleejis with intense curiosity and a modicum of trepidation.  Bracing for sock vinegar, I cut that shit open and extruded a great sticky, difficult mass of sweet-smelling goodness; fat, slightly compressed dates in a small amount of thick date syrup.  Presumably.

​They taste like date-infused caramel or caramel-infused dates with faint floral and liquorice suggestions; in a word, delicious.   
Picture
So delicious that my own gluttonous desires compel me to hide them under foil and bury them at the back of the fridge for fear of diabetic coma.  See the pic to the left there for a comparison with the conventional Iranian mazafati.

​My advice: embrace this delightful caramelized spawn of ye olde Phoenix dactylifera. If you're going to cook with dates, and I do so with increasing regularity (leg of lamb roasted with apples and dates fuck yeah), this is probably the best form to use. 
Picture
If you see me walking around with something brown stuck to my face, it's a date, damn you.

*   Selected Ravings   *   Kitchen Bitch   *   Read the Book onsite   *


Kitchen Bitch:  Hey hey, let's cook Black Rice

8/12/2015

 
Picture
While I grew up cooking both Indian specifically and Asian food in general, I'd never done black rice at home.  Perhaps because I've tried almost every other variety known to man and found they generally don't live up to the hype, because they're all just... rice, really; Oryza sativa, that ancient friend.  An exception to this blanket dictum is a good montane basmati, which is truly distinct in both flavour and texture from your long/medium-grain standard commercial varieties.  

Today I'm using an organic Thai black rice.  Some black rice is glutinous but I did not find this one particularly sticky even though I overcooked it, so I'm assuming it was one of the less gluggy varieties.  I don't personally consume much cereal any more; when we do, w
e eat wholegrain (non-hulled or brown) out of a (probably half-superstitious) belief that less processed = better.  According to Wikipedia, black rice is fucking loaded with anthocyanin, iron and vitamin E, however the page sort of reads like something issued by the Black Rice Hurrah Ambitious Growers Association, so my critical faculties are toning that shit down by half.  Whatever.  If you're going to eat rice, black wholegrain is probably the way to go.

Whole rice of all persuasions is the shitty and distracted cook's friend, retaining an acceptable texture waaaay beyond the point when white rice collapses into blown-out pasty mush because you forgot about it in your narcissistic self-absorption.  I soaked this rice overnight as per recommendations and found it fast-cooking and tender, to the point where a wholegrainphobe would possibly overlook the fact that they were
actually consuming fibre and nutrients.  It's also very beautiful, retaining all those inky ochre copper eggplant tones through the cooking process and lending even boring bumfuck not-again dishes its undisputed aesthetic advantages.

I can report that all that rhapsodical flavour hyperbole around black rice is exactly that- confabulated hipster bullshit.  It's not going to take your tongue on a magic carpet ride as-is so forget any notions of lingual psychedelia.  It just tastes like a mild high-quality brown, with maybe a five-percent swing toward bland, slightly smoky sweetness á la basmati, rather than hitting you with those hard, grassy notes sometimes present in coarser wholegrain varieties.  But this laid-back, neither/nor aspect is what makes it such an eminent vehicle for other flavours; it really did come out swinging as a fantastic absorber and projector of condiments and sauces.
Picture
Okay!  Let's cook this shit.  R's making toasties in the background but I want to do it now so just ignore him.  I bought half a kilo of organic black rice and that cost me $6-something NZ dollars, which is stupidly expensive.  

​What are you going to do- grow it yourself?
Picture
Here's what the raw grains look like- phoenix food is the first thing that came to mind.  I'm going to soak a standard cup of the dry grain in cold water overnight, which I'll put in the fridge because it's summer, I'm not making beer and food poisoning's bad, mmmokay?
Soaking isn't absolutely necessary.  I have a dodgy gut for grains and find it improves digestibility.  I add about triple the dry volume's worth of water to anything I'm soaking and that's always worked well across the board.
Picture
Picture
​Halfway through the next day I yoink it out of the fridge.  It's swelled a wee bit but not as impressively as something like chickpeas.  Rinsed, into a pan with the obligatory three xs cold water, no salt (salt can make some rices swell and burst so I generally abstain), covered and brought to the boil.  Five minutes of this + another twenty or so of quiet simmering got me cloudy purple water and a very slightly overcooked result.  Compare the cooked grains to the raw ones in my palm below right.
Picture
The rice blew up to around triple the original 1 cup volume; this impressed me and took some of the sting out of the price per kilo.  It also drained and dried out well in the sieve without glueing itself into a hard lump.  I put it back in the fridge for tomorrow.
Picture
Picture
Lunch is a free range peppered pork steak, asparagus and my patented WTF fried rice which is a shredded Chinese omelette and whatever vegetables and sauces haunt the fridge (today cauliflower, mushrooms, spring onion, and fucking tomato which is not a match for Hoisin sauce so don't ever do that). 
Picture
The original one cup made enough for four people in the context of this meal, but R eats for two and I held some back for another dish so it worked out well.  The black rice stayed structurally intact, didn't stick to the frying pan and certainly broadcast all those flavours nicely; it did amplify the sweetness of the sauce so perhaps keep that in mind.  You can make a shitload of different sweet dishes and puddings with this lovely grain so have a look for them online.  I know I will be.  

*   More Kitchen Bitch- cooking decent food at home from scratch  *   Selected Ravings   *


Kitchen Bitch: Half-Basque Eggs / Disaster Frittata

9/10/2015

 
Picture
The meal to the left there might look like something that was struck by an improvised explosive device, and it is fair to say it's not exactly photogenic.  But it's like sex in that respect; you can kill the hotness by trying to make it look good and commercial porn is proof of that particular pudding.  We make this dish once a week and I can honestly report that this is possibly the most spectacularly ugly version I can remember, I think because we skimped on the eggs this time round.  Never mind.  

I call this Half-Basque Eggs in honour of a friend (the semi-Iberian/Euskal element) who returned from a trip to his maternally ancestral Navarre mumbling fervently about... this local traditional thing, with um eggs, and all this other good shit that was fucking delicious... without being able to specify much else because hrmmmph no cook just eat: manbrain.  He was trapped in the memory of that goodness and could not articulate its particulars.

​Luckily I knew that good shit in this instance meant fried/roasted/protein; I have incorporated those and the rest is highly expedient experimental appropriation resulting in this cobbled-together inauthentic rendition of something I have never really experienced in its true form.  But don't let that put you off.  It is fucking delicious.

The really great thing about this Basque Eggs is its endlessly accommodating nature.  All you need are 5-6 eggs and whatever you've got lying around.  It can be fancy and full of expensive impressiveness i.e. exotic mushrooms and awesome charcuterie, and you could cook it in those egg ring things to attain discrete, presentable portions.  It can also be a dumping ground for 3-day old leftovers you wouldn't eat any other way.  Today we are taking the middle Way.

Another attraction of egg things like these are their omnichoronological appropriateness.  Any given sliver of the day or night is Half-Basque Eggs time.  The meat-free version, especially with roasted vegetables, is perfectly satisfying and delicious.  It can be as unprocessed, Paleo and low carb as you like.  All that and it reheats without prejudice when you make too much.
Picture
W H A T   Y O U ' L L   N E E D
- 5 to 7 Free-range eggs, depending on size.
- Olive oil
- Smoked paprika, pepper, salt
- Your preferred herbs
- A vegetable medley; today we use tinned three-bean mix,  zucchini, leeks, mushrooms, kale/spinach/silverbeet and leftover roast root veg, but you do you.
- Your choice of protein.  We've got a nice dry chorizo but any sausage or smoked fish is nice.
Picture
< Chop all your ingredients, including herbs, into chunks, except the sausage which is best sliced finely.

​Set aside.  

​In your largest frying pan, bring a bit of butter and olive oil and cracked pepper to a fairly high heat and fry the stuff that needs to be cooked or browned; the meat, and any mushrooms and onions etc.  
Picture
> While this is happening, mix all the eggs in a bowl with pepper, paprika and a bit of salt.  No need to aerate- just combine robustly. 
Picture
Picture
^ Drain your beans or whatever canned stuff you're using.  Withhold any leafy veg, but add the other greener ingredients to the pan and give them a bit of a brown once the meat and mushrooms are caramelised.  By comprehensively frying everything that will take a bit of colour, you're ensuring depth of flavour.
Picture
Picture
> Add the green leafy vegetables and stir through carefully.  No matter how carefully you stir, it will now become apparent that your pan is too fucking small for the amount of food you're trying to prepare.  You can learn from our mistake.  We never really do.
< Turn down the heat and pour your raw spiced eggs into the frying pan slowly.  Or quickly.  Whatever.
Picture
Picture
Toss in a bit more olive oil and pepper.  Turn the heat up a wee bit until you can see the eggs beginning to solidify, but it's important to keep everything moving so nothing sticks too badly to the bottom.  It will probably stick a little bit unless you have one of those next-level pans, but the worst of it gets sweated off in the cooking process so don't panic.  Keep heating and turning it over until you start to get browned looking bits of scrambly egg as per the lower right image.  We like our eggs hard so we keep going til it's all a bit rubbery, but you can stop when you see the kind of result you prefer.
Plate up with some bread if you like, but this is a substantial meal in itself and additional starch isn't necessary.

​
This amount serves four polite adults or two greedy ones with leftovers.
Picture
Picture

*   More Kitchen Bitch   *   Photoessays   *   Selected Ravings   *   Read the Book onsite   *


Picture

Monday slash Tuesday: Fuck moderation- treating oneself with handmade New Zealand chocolate because who could be more deserving slash shut up stupid pancreas.

17/7/2015

 
Picture

No one really says this out loud.

But one of the most unquestionably awesome things about losing a lot of weight is setting aside your tiresome, abstemious sanctimony for a day and oinking loudly as you roll off the wagon into a great big pile of artisanal chocolate. 

Knowing you're not going to wake up fat* the next day.

Just sayin.
Picture
* It takes 7000 extra calories to create 1 kilo of onboard lard.  This is nowhere near that amount.  Edumacation- never a waste.

Chilling at home as midwinter rolls around needs a little something to take the stabby edge off.  I'm a veteran chocolate whore with surprisingly high standards and a few years of professional tasting under my belt so all this was inevitable.  In my commentaries about weight loss I discuss why you shouldn't expose yourself to binge cues, but let's just stuff a rag in that shit's mouth for a moment and rip the postbags off the goodies my onboard Satan ordered online.  First up- a few small-scale delights from Shoc Chocolate including these gorgeous marzipan fruits.  
Picture
Look at these little faux fruits- so cute.  And so dead now.  

This is their only memorial.
Marzipan- a lot of people shift uncomfortably when you discuss it but I urge you to expose yourself to the good stuff.
Picture
I picked up a block of their (Shoc) white (judge me all you like) + cardamon.  See it below left.  Pretty good; smooth, quality fats, nice mouth feel- not at all waxy, excellent ratio of chocolate to spice and the fragrant pounded pod bits were exactly the right size.  We were a little less enthusiastic about the dark chocolate-robed apricots; you need really great fruit to support this simple treatment and the quality was mmm... not quite there.  We ate them, alright, but they were a 6/10 sort of thing.
Picture
Picture
Moving right along to Patagonia Chocolates.  Ran into a little bit of ordering drama as they were revamping their site but they were very nice and comped me a truffle.  That's all it really takes to secure my eternal loyalty.  

Embarrassing, isn't it?
Picture
Picture
 < I got the make your own choice of slabs box and a random selection of truffles.

R loves dark and I have broad tastes, so it was great to be able to compose our own mix.  His standout: Dark+candied peel. Mine- white+fig.  8.5/10

One of the best ways to really put an unfamiliar food purveyor to the test is to order something you wouldn't normally choose, and in accordance with that principle I picked out both a boysenberry and a passionfruit truffle.  Fruit truffles are something I steer clear of because the ancient trauma of Cadbury Strawberry Roses is a scar that never heals.  Am I right, fellow Commonwealthians?
In my extensive experience they're often full of inexpensive gack no matter how high-end you go. 

Whatever Patagonia puts in their truffles sneaked past my Cerberus tongue and pleased the rest of me greatly.  They were so utterly delicious that I forgot to photograph their innards so... I don't know... just imagine someone else biting into a fucking delicious handmade chocolate right in front of you and really enjoying it without offering you any.
Picture
I also judge a chocolate house on its caramel.  
So rude.  Another 8.5/10 moment.
Picture
No decent caramel = no dice.  The Patagonia Caramel Peak was crammed with silky old-school condensed milk home-made-type goodness.  Like tonguing a sylph.  A sylph who's been stuffed full of sugar and suspended over a gas burner for some time.
Picture
I swiftly became one with that Caramel Peak and regret only the impulse-control that limited my order to a solitary example.

A solid 9/10.
Picture
So to summarise; no one died and New Zealand chocolate is in good health.
(I buy all my own review items @ full retail and have no association with any of the suppliers mentioned.
This is more gratuitous oversharing than a review anyway lol.)

This week I think the Lovely R is writing something about photography on a budget; which gear and why, where to start etc.  He knows what he's talking about and he's cheaper than a cold pie so I'll just let him get on with it.

*  Reading the latest Book serialisations but missed the start?  Read it onsite here   *   Photoessays  *
*   Kitchen Bitch- easy home cooking   *   Selected Ravings- I never shut up, ever   *


Kitchen Bitch: Tadka Dal (Yellow lentil curry)

2/4/2015

 
Picture
Properly Dal Tadka,but we've always spoken of it the other way round in our extended family so that's the way it stays for this recipe.  I think this is a Punjabi dish originally and a favourite of my Tamil aunt, who was raised in Malaysia and now lives in Australia; she passed this version to me, which I cook in New Zealand.  It's a big old citizen of the world, lol.

The dal pea looks like this (right) in plant form, and yields these pretty orange split peas as pictured below.  From these the finished dish derives its mild earthy savour while copious turmeric furnishes that lovely ocherous hue.
Picture
Picture
Dal is an ideal novice or dumbarse's introduction to Indian food because you can't really get it wrong.  It's simple and you can overcook the hell out of it without anything bad really happening.  

Tadka dal is on its own a cheap way to feed a mixed crowd and a great accompaniment to meat curries.  This is a utilitarian version designed to make the most of whatever's lying around the kitchen/needs using up.  You can make it several days ahead and is quite stunningly good for you.  You'll fart afterwards, though.  I do feel bound to say that.  We had it for lunch and I'm gassing myself right now : / 
If you're a bean-friendly phenotype or a regular consumer of legumes you probably won't suffer too much toot factor, and adding a bit of asafoetida is supposed to tame the methane.  I've never tried.  Still keen?  Let's get down to it.

Please be aware that this recipe is also extremely elastic and you can expand the relative quantities almost infinitely.  Those listed will feed two peeps with leftovers. I'm adding a little more to my batch today so don't worry if it looks more than you expect.  Nor do you need to stick religiously to what I've listed here; the pea/spice base is delicious without anything else thrown in (and is traditionally simple), so by all means get shit-happy with the additions.
W H A T   Y O U ' L L   N E E D
- 150g of dry split red peas / lentils
- 750ml water
- 1 onion
- 1 big tablespoon cumin seeds or powder
- 1 big teaspoon fresh or powdered turmeric
- oil for frying
- salt to taste

- garlic to taste, chili powder if you like.
- green and/or root vegetables of your choice: today I'm using a large zucchini, 1/3 of an eggplant, a leftover roast veg medley and silver beet leaves.
- a tablespoon of butter or ghee
Picture
Picture
Picture
First rinse the peas in cold water because they're often dusty.  Then chop up your vegetables into bite sized chunks and fry the fresh ones with the onion and garlic, brown well, and toss through any that just need reheating such as the roasted stuff here.  Set this mixture aside.

Throw the peas and spices into the same empty pot and add all the water.  Bring this to the boil and cook briskly, stirring often for about 10 mins (a little longer for larger quantities), then turn down the heat to about a third of your source's capacity and simmer for about 20 mins, keeping an eye on it.
Picture
If you don't keep an eye on it, the lentils will stick like bloody hell to the bottom of the pan and create a burnt black mess you'll need either industrial acids or a very submissive partner to remove.  Taste the liquor.  It should be really resinous and turmeric-y as this is the whole point of the dish.  Add more spices at any stage if you think it needs it.
Picture
Once you think you've gotten the proper cooked look, stir in the reserved vegetables and allow to heat through and exchange flavours for about 10 mins.  I like to add the butter or ghee at this point because delicious fat: it gives a silky rounded mouthfeel and tames the oily bitterness of turmeric.  Salt to taste.  Pepper is good too.  Keep any greens out til the last minute before serving so they don't wilt down too far and lose their integrity.
LEFT  This is how the mix looks after the first ten mins.  Not done.  You're aiming for a sludgy pease porridge as per the below image.  The sludgier, the better.  It takes on an almost floury puréed look so don't be alarmed or despondent when this occurs.  You done good.
Picture
Picture
Garnish with a bit of finely chopped silver beet and curry leaf or coriander (< this is parsley because I didn't have any of those on hand).  Dal gets a wee bit stiffer as it cools and loosens up again when reheated.  

So many vegetarian recipes claim to please the meat lover but Tadka dal one of the few that didn't leave me feeling cheated even in my hardcore meat-fascist youth; serve with confidence.  This is a hearty winter meal (especially when you're bored with stew) and an easy summer one, effortlessly tarted up for company with a variety of Indian breads like naan or paratha and finished off with kulfi.  You can bulk it out with rice in a pinch, and if some arsehole's sitting there whining about its meatlessness, either show them the door or pander to their entitlement by serving with steak fried in cumin and fennel seeds, pepper and garlic.

Pease porridge in a pot, nine days old is barely an exaggeration; this stuff keeps really well in the fridge, unless you've added a vegetable that doesn't.  Reheat slowly and gently or the nightmare burnt bottom shit gets real in the blink of an eye.

*   More Kitchen Bitch   *   Best of the Blog   *   Ethnographica   *


Kitchen Bitch: Rabbit Casserole

14/2/2015

 
Picture
Here in New Zealand, feral rabbits are an ongoing environmental and agricultural disaster, munching crops, degrading natural ecosystems and supporting a range of terrible introduced predators of our native wildlife.  If you're going to eat meat, wild-caught pest species are probably the most ethical choice you could make and we have no qualms about consuming them, one furry little apocalypse at a time.  Dick the hunter down the road thins out the rabbit plague on Otago peninsula on a regular basis and he dropped a few off for us the other day.  You rule, Dick.

In regard to public acceptance, rabbit meat has disappeared down a bit of an intergenerational rabbit hole; once widely appreciated, these days it tends to be spurned by a lot of older baby boomers who equate it with growing up poor and having little else while most younger folks are just completely unfamiliar with its inoffensive versatility.  A single bunny costs $20-30 each in the supermarkets here (when it's available at all) which is just fucking ridiculous and hardly encourages converts.  

So don't feel bad if you've never had the pleasure.  And don't worry that your more conservative associates will turn their nose up at its gamey exoticism.  As far as flavour and texture are concerned, even wild rabbit is virtually indistinguishable from a mature free-range chicken; look at the fresh cuts below and ask yourself how many neurotic neophobes would be able to spot the anatomical differences.  Lol.  Just lie and they'll love every freaking bite.  

The usual free-range culinary caveats apply- slow cooking is best, and one-pot recipes do it all the favours.  The one I've used here is a version of my universal free-range/game tomato summer casserole with ingredients easily culled from the garden or purchased cheaply in season.  Stuck in winter?  Just replace the zucs with canned red or white beans, celeriac, carrots and spuds and serve with some steamed brassicas.  

This dish is nutritious, relatively economical, ethical, paleo-adjacent and virtually free of sloppy carbs.

W H A T   Y O U ' L L   N E E D
These measures and ingredients are meant as a rough guide; don't fret if you're short or overflowing.  Being of course skinless, rabbit is bland and lean and tends toward dryness so I pump up the fatty/savoury factor with a few spicy sausages, but you could use a good dry bacon if you're short on meat. You can throw in wine or stock if you have it lying around.  We try to limit our refined starch intake (because that shit works) and use boiled potatoes as a foil here; quinoa, pasta, couscous and brown rice are perfect too.
Picture
- 500g to 1kg of jointed rabbit
- 2-3 small dry smoky sausages ie. chorizo
- 1 400g tin of tomatoes
- 1 small tin or two tablespoons of tomato paste
- 1 teaspoon sweet smoked paprika

- 2 tablespoons of plain flour
- A massive handful of green herbs (I used bay, thyme & oregano but whatever you prefer)
- Big teaspoon of cracked black pepper 
- 1 head of garlic, chopped
- 2 large zuccini or squash +/or 1 medium eggplant 
- 2 really big handfuls of diced mushrooms

- 1 tablespoon of quince jelly or relish (optional)
- 1 big chopped onion

- butter and oil for frying

Picture
Picture
Pat your meat dry with a paper towel; combine flour, paprika and pepper > and use this to dredge or coat the raw rabbit.  Shake off the excess flour mix and fry these pieces in a pan in a mix of butter and oil with a bit of garlic and bay; you just want to brown them as per below.
< This is about 700g of rabbit which is about 1medium-large dressed beast.  Leave roughly jointed or cut into smaller portions.  Put the oven on to around 200 ºC.  Get all your vegetables, garlic, sausage and herbs chopped as per above image, open your tins and then set them all aside somewhere out of the way. 
Picture
Picture
Once browned, transfer them to a big casserole dish and use the same grease to brown the onion, sausage and garlic.  Make sure it's all well-caramelised for maximum flavour.
Picture
Picture
Transfer everything to the casserole dish as you go, frying up the remaining vegetables.  If you're adding pulses, throw them in with the rabbit now.  If it's not too burnt, deglaze the frying pan with water or stock (up to about one and a half cups) and pour into the dish along with the tinned tomato, tomato paste, herbs and maybe another dash of paprika, salt and pepper.  Add your relish or quince paste; a nice bit of jam or wine will stand in for the latter.  Mix thoroughly.
Picture
Commit the casserole to the oven for anything from 1-2 hours, depending on the volume and liquid content of your final assembly; just keep checking and stirring.  I turn it down to 150ºC halfway through if I'm not in a hurry, but today this one took 80 mins @ 200 ºC

You want to reduce it to a syrupy, concentrated deliciousness, transforming it from the bountiful promise below left, to the glistening spectacle below right.
Picture
Picture
Picture
Picture
Ka Pai!   Put some spuds on to boil 20 mins out from your ETA and serve on warm plates with some fresh bread if desired or whatever starch or grain you prefer.  It's always better the next day, so make it ahead of time if possible.  

This casserole provides a stream of delicious leftovers; just keep in mind that wild rabbit can toughen if reheated too briskly and removing the meat from the bone for your second round is probably optimal (if you're fussy about that sort of thing.)  The mix can be used in a pie or pastie-type situation, tossed through some stir-fried green vegtables (I like a kale and broccoli mix) or piled on toast with hunks of cheese grilled over the top.  I've used parmesan over this lot >

Though it may seem counterintuitive, eating these kinds of meals has helped me lose a shit-tonne of weight and get fitter and stronger than I thought possible.  I've detailed the theory and practice here if you're interested; I'll post more about the continuing process soon.

*   Best of the Blog   *   More Kitchen Bitch   *   Photoessays   *


Kitchen Bitch: Tuna & Cannellini Bean Casserole

23/7/2014

 
Picture
Technically, this tuna casserole is more of a pasta sauce really, but it's eminently bakeable so I'm going with that designation.  It's certainly not fancy and could even be accused of crossing over into that blasted commestible heath on which tin-based fails and student food wander like orphaned mooncalves, unloved and unlooked for.  But that's just pointless snobbery; like all the best meals it is delicious, healthful, economical and flexible.  You can have it on toast or in a panini.  Or if, like me, you're largely eschewing starch and doing a Paleo type thing, it's yummy plopped over some stir fried veg.  You can bake it under some cheese and breadcrumbs (Homer face) or over potatoes.  I've yet to meet someone who couldn't stomach it and you might even tempt a few vegetarians.

It also has the advantage of being simple enough to kick the bullshit excuses out from under your favourite/adjacent Noncook.  This cosmopolitan creature presents two variants; those who have genuinely never had the time or opportunity to learn (I still judge you, but I also accept that you might have a reasonable excuse), and those who simper that they don't know the first thing about food and ooze out of the kitchen like they've just left you enchanted with the prospect of doing everything yourself while they're cruising porn on their laptop.  If we were to be a bit more fucking charitable, we could go with the idea that recipes like this cater to the culinary agnostic; to those who admit that cooking may well exist without conceding they will ever possess knowledge of it.  Whatever.  Consider this casserole a kryptonite buttplug for the domestic shirker.  Eggplant is the most exotic component so they can even shop for it unsupervised.

I love tinned tomatoes so much I can't tell you.  I know they're supposedly full of pesticides, but as a child of the 70's I'm probably some sort of human/DDT Brundlefly anyway and am therefore merely augmenting my powers with that shit.  Don't be afraid of cannellini beans; know baked beans?  They're like that, sans orange gloop.  Look >, perfectly harmless.  You can add whatever bean you please, actually, or none at all.  As with most things I cook, the proportions aren't set in stone so just use what you have.  Double the tinned tomatoes if you want to make a monster portion.  My frying pan was only just big enough for this lot.  If you're not into tinned tuna, try a smoked fish like mackerel.
Picture
W H A T   Y O U ' L L   N E E D
- Olive or rice bran oil, or butter to fry
- Black pepper, salt
- 1 large onion
- As much fresh garlic as you like
- Half a large eggplant or 1 whole small
- A big handful of mushrooms 
- 1 small/medium tin of tuna or smoked fish
- 1 small tin of tomato paste
- A handful of fresh flat leaf parsley
- 1 400g tin of chopped/crushed tomatoes
- 1 tin of cannellini beans
- 1 Tbspn of tomato relish or apple/quince jelly
- As much pasta of your choice as you need.  Couscous etc is also fine with this.  Or Vege.
- Cheese of your choice to garnish.  Or not.
Picture
Picture
Picture
^ This is the kind of tuna you're after- in oil, nothing too fancy.  Masochists can go right ahead and use the kind packed in spring water.  Chop the fresh ingredients, open the cans and get it all ready to go.  It's like a stir-fry, in that it's better to have everything prepared before you turn on the heat.
> We always chop garlic like this, with its inner paper still on, rather than peeling it.  Much faster and the paper just sort of disappears in the pot so don't worry about laboriously skinning each clove.  This is my garlic from last year and it's going to seed, hence the green sprouty core.  Don't worry about that- it all tastes the same.
Picture
Picture
Picture
> It's pretty important to get these base ingredients looking like this.  Blandness will ensue if you don't.
Get some oil into your frying pan, crack some pepper and chop a bit of your fresh parsley into it.  Fry that for a bit on high heat before adding the onion.  This flavours everything from the bottom up, if you know what I mean.
Picture
< Half-brown the onions and chuck in the sliced mushrooms and garlic.  When they're almost done, add the eggplant and keep it moving so everything gets a nice brown caramelization happening.  
Picture
Okay!  We're halfway there.  Once everything's thoroughly browned, pour in the tinned tomatoes and the tomato paste and combine carefully, especially if you've used a too-small pot like me.  Reduce the heat a wee bit; this mixture will start sticking to the bottom pretty fucking smartly if you're not careful.  Add about half a tomato can of water, depending on the consistency of its previous contents.  You don't want it too runny, but too thick is no good either.
Picture
< You're looking for roughly minestrone thickness.  Throw in the drained tins of tuna and beans and chop the remaining parsley into the pan.
Picture
Picture
Picture
We usually eat wholemeal pasta but it's not exactly photogenic so we'll suffer the white, diabetes-inducing kind today, just for you.  To cook the pasta I bring a generous pot of water to the boil, dump in the noodles, stir, turn the ring off and cover.  After 10 mins you get great pasta; after 30 mins of internet-fueled absenteeism you get a solid mass of bloated whiteness, so don't forget about it.
Picture
< Add your spoon of jelly or relish at this point but don't lose your mind if you don't have them in the kitchen; this is just unnecessary wank really, especially if your tomatoes are nice.  Turn the heat down, put a lid on it and cook it gently while you're getting a big pot of salted water boiling for the pasta.
Picture
Same goes with the casserole- 30 mins of simmering and nothing more, especially if you're going to reheat; the beans will start to collapse if you go too far.  Not the end of the world, but sort of suboptimal.
^ This is 500g of spiral pasta.  You don't really need this much; I just went a bit crazy and threw in the whole bag.  You can use macaroni or fettucini etc if you prefer and possibly stuff some tube pasta with it too.
Picture
<  Mmmm, leftovers. White pasta especially tends to soak up the sauce so if you've used the whole bag and want to bake it in the oven the next day, you might need to add another half-tin of tomatoes and maybe some anchovies or a little more tuna.  

This recipe tides the two of us over for three days and that's an economical meal for you, folks.  It will feed 6 reasonable adults pretty well or 4 very hungry/greedy people in one sitting.  Serve with good fresh bread and quality parmesan.

*   Use your powers for good.  More recipes here   *


Planting & Growing Garlic at Home.  Riveting, I know.

23/6/2014

 
Picture
This is a totally unglamorous and  yawn-inducing post to anyone neither interested in gardening nor food, so philistines falling laxly into either category are excused and can go back to fondling their piercings (noticed how many fresh lip hoops there are lately?  Is there a 1994 wormhole out there?) and sending nudie selfies to randoms.  

We've been growing our own garlic for about 6 years now, favouring a local heritage Printanor-type pink skinned variety, yes in part because of the wank value but mostly because of its superior taste and resistance to things like rust, since we don't spray or much bother with strenuous shit like active cultivation.  These plants will have to pretty much look after themselves once we've done them the tremendous favour of sticking them in dirt, so if you're lazy or organically inclined, we advise you ask around about tried and true varieties in your area.  Don't rule out modern strains if you've heard good things, though.  

Picture
Growing garlic can be both stupidly simple and frustratingly arcane.  In a good year (whatever that means- we're still scratching our heads) you'll get masses of great fist-sized bulbs with little to no effort; in less propitious seasons you'll end up with pissy little plants that expend what energy they've stored cheating you with their sneaky, snaky flower stalks.  Up til now I've always planted in autumn, following the advice of several online garlic gardens, but that's gotten me two years of early flowering and diminishing returns, so this time we're going with tradition and setting out the cloves in the end of June, just after the (southern hemisphere) winter solstice.  Garlic is easy to grow but primo bulbs are apparently dependent on all kinds of temperature and moisture constraints.  From what I can gather, a good fat set seems to require a cool winter and spring and a hot, dry summer, especially around harvest.  In our zone 9 maritime conditions, one season can extend a long way into another and rain is guaranteed, so we're probably suboptimal; my onions are often mediocre too.  Oh well- the Allium family is fundamental to our food chain and the commercial crop tends to be quite heavily sprayed, so ho-hum home-grown is better than nothing. 

Anyways.  What you're seeing to the right here are examples of the garlic I'm about to plant (L 2 R) nice big Printanor clove from my mother's garden, a robust brownish-papered variety from a friend's crop (thanks Jared)  and one of my own crappy little cloves from the last harvest.  Choose the fattest cloves from the outside of your bulbs, avoiding any that are fungal, holed, budding weirdly or bruised.  Some peeps peel theirs but I don't think this makes a difference to strike or yield.  I've often wondered if clove size really does matter, so I'll be keeping an eye on this crop with that in mind.

Picture
< Here's part of our messy, neglected midwinter vege garden.  It's growing Cavalo Nero kale and not much else.  The soil is pretty good here, about 30cm deep, raised, well aired and enjoys all day sun.  This is the kind of position you'll need for healthy garlic plants.
Picture
ABOVE   I know it's boring, but do dig it over well before you plant.  The garlic will get a much better start.  I'm not adding fertiliser at this point since this is nice dirt and I prefer to wait till the plants are in active growth before feeding them.  I'll use a few handfuls of sheep poo and some blood and bone, scattered between the plants as soon as the green tops start showing.  Don't let the fert touch the sides of the new plants or the stalks might burn/rot out.
Picture
<  How much space do you need?  Spread you fingers to their widest extent; each clove will need about this much hand room of its very own.  You don't have to do pedantic rows and garlic takes up less space per plant than many vegetables, but don't overcrowd- you'll just end up with wimpy unproductive plants.  I pay out the cloves onto the ground in very rough order to work out how much bed I'm going to need- it's as good a method as any.  This is about 80 cloves and they ended up, once planted, needing about a meter and a half square.  You could plant a little tighter in a pinch, and quite a bit wider if you're after competition garlic.

BELOW RIGHT  Always remember to plant the cloves with their basal plate (the bit where the roots come out) downwards in the soil; i.e. with the pointy end upward.  Your soil should be tilled enough for you to be able to push them in gently, so if you're squishing or forcing the cloves down, that's a fail.  There are as many theories about planting depth as there are gardeners, but we prefer to just cover them with a light sprinkle of soil so that they're barely hidden from view.  I don't think it's crucial, so don't panic if you've gone a little deeper.
BELOW Once the cloves are tucked away, it's time to stake out and cover the plot.  Garlic can take a while to emerge and weeds can obscure the baby plants, so mark out the bounds of the crop with sticks or stakes. When the leaves start to show, fert it and mulch it; we'll use browned-off pine needles for this because they're free and local.  Do not forget to cover the plot with something or the birds will come sailing down as soon as your back's turned and trash all your hard work looking for worms.  Every time.
Picture
Picture
< We chucked a few greenhouse shelves and idle bamboo canes over it to foil the blackbirds, which is lazy and unsightly but perfectly effective.  Any netting or substance that will let light through and discourage digging will be fine.   Okay!  You've planted garlic!  Now sit back and wait.  You should see strap-like, upright leaves in a month or two from now.  Keep them watered and weeded and you'll end up with a whole lot of pungent deliciousness come midsummer.  I'll be posting more practical, non-aspirational (lol) gardening tips from spring onwards and will update this crop for the benefit of constant readers, so please stay tuned.

*   More floral wonder Here   *   More photoessays Here   *


Kitchen Bitch: Lime Curd

30/4/2014

 
Picture
It's basically a custard-type thing that you refrigerate and eat on toast, cakes, in yoghurt... that sort of stuff.  If you're any kind of citrus freak you'll think you've popped your clogs and gone to heaven.  
Picture
It's strange how many people remain stubbornly unfamiliar with, and even leery of, the delightful lime. According to Tantric tradition, limes are great against demonic possession and the evil eye.  It is the lemon's hipster cousin, tasting definitely citric but rather more complex and fragrant than the latter, as if the coconut and osmanthus fairies had attended its birth and bestowed their fumy blessings.  Limes don't have the bite of the old-timey lemon proper and this mild manner has made them subject to abuse in a range of disgustingly sweet dessert recipes.  We need not concern ourselves with this; lime curd isn't something you can be forced to consume by the sickening slice while some well-intentioned associate sits waiting to insist you have another.
Picture
Fresh lime curd + plain yoghurt
If you divide it into tiny presentation jars to pass around your friends they'll thank you profusely then probably hold you writhing over naked flame til you divulge your methodology.  To hell with them.  We're keeping this lot for ourselves teee heeee!  You probably will too.
This version is adapted from a never-fail lemon curd recipe I found... somewhere... maybe online?  I dunno.  I think it'd work with any citrus fruit, possibly even grapefruit, if you're not into limes or can't obtain them.

A small word of warning to the susceptible (you know who you are)- this stuff is like crack and once you've had your first bump, it's allllll over.  Forget calorie restriction, forget social responsibility, forget your firstborn... you can try to hide it at the back of the freezer, but it never sets deterrent-hard and is always cooing to your lizard brain about that time you guddled the last bit out of the jar with your hands naked at midnight and how fucking good that was (I regret nothing).
W H A T   Y O U ' L L   N E E D
- About 5-6 medium size limes
- Roughly 6 tablespoons of softened butter
- 1 cup of white sugar
- 2 large free range eggs, + 2 extra yolks
- The zest of one lime
> There's no real need for precision.  Just whack off 6 big hunks of butter and drop them into a bowl, then zap them in the microwave or stand the bowl in hot water like this until they're soft, but not melted.  Dump in the cup of sugar, and cream them with a the beater of your choice until they're respectably cake-mixy as per below.
Picture
Picture
Crack two eggs whole into another bowl, then two more into yet another bowl, letting the white pass through your fingers each time and adding the reserved yolks to the whole eggs.  Using fresh eggs will allow you to cling to sanity during this procedure since the yolks tend to remain intact.  Give the spare whites to your pets or save them for an omelette.
Picture
Then add the eggs, roughly one at a time, to the butter and sugar, mixing thoroughly in between.  Cut the limes in half and squeeze them hard until you have your two-thirds of a cup of juice.  Try to exclude any pips.
Picture
Picture
Picture
Picture
< Add the juice to the creamed sugar and eggs and mix well.  It will start to look 'split' and curdled (see below) at this stage, but don't worry, you're about to cook it into submission.  Pour it into a medium saucepan (not the crappy one- use the one with the decently thick bottom that distributes heat evenly).
Picture
> On a low setting (less than a third of your element's capability), and stirring very frequently, heat the sauce through until it begins to recombine and become silky smooth.  This will happen quite suddenly sometimes.  Do not wander off- keep stirring, dammit.  If you succumb to the temptation to heat it too much/quickly, you'll just end up with limey scrambled eggs, so yeah... don't do that either.

After around ten minutes of constant, watchful stirring it will start to thicken.  Not crazy thick; just heavier to push around the pot and to the point where it thinks about sticking to the bottom, that sort of thing.  Like regular custard.  We're nearly there!  
Picture
Picture
Picture
Remove from heat, make sure it's not sticking to the bottom and add the fresh zest of a whole (well-washed) lime.  You can do this with the finest panel of a regular cheese grater if you don't own a purpose-built zester.
Picture
^ You can leave out the zest if you're weird about zingy green shit floating in your food, but I think it adds another layer of awesomeness myself.

< Bag up the curd in a very clean large jar that does not smell of pasta sauce or relish or anchovies and keep it in the fridge for a week, or the freezer for a few months- you can still use it straight from the jar since it never solidifies fully.  It will set further until it sort of resembles thickest custard/room temp butter.  Try it on hot toast, crumpets, waffles, ice cream, swirl it through plain yoghurt while it's still warmish, wipe it onto a boring cake and smoosh it onto scones.  After a jar or ten there might be more of you to love, but you won't mind.

*   More delicious recipes - all killer, no filler   *


Kitchen Bitch: Quince Jelly

7/4/2014

 
Picture
The quince, perhaps more striking than handsome, is one of our most ancient fruity companions, originating in the Middle East slash Sou-west Asia and providing us with a number of highly delicious dishes since a long time before it featured in the Song of Solomon.  Quince to me sounds like something vaguely soggy and sort of citrus but no, they're a hard, plain apple-like fruit that smells... hmmm... like hallucinogenic roses, really; like a nice pomander with a touch of that awesome glue you definitely never huffed in the 7th grade.  As anyone who's ever bitten into a fresh quince knows, they're best cooked, and that's what we're doing today- making quince jelly, which is a dense, fragrant, wobbly-type jam, bright sunburnt pink and shyly translucent.  Once you've had it on toast and added it to your everyday cooking you won't know how you did without it all this time.  

I get my quinces posted to me since the local fruiter insists on charging $2 a piece and that is bullshit, my friends.  We have our own tree but it's still jailbait as far as production is concerned.  They're increasingly easy to come by so just ask around until you secure your own source.

Picture
W H A T   Y O U ' L L   N E E D

- About 3 kg of fresh quince or other pome fruit
- About  6 cups of white sugar
- 2 big lemons
- A BIG jam or pasta pot.
- A medium square of clean cheesecloth (see below)
- A colander or sturdy sieve 
- About 6 standard jam jars + lids
< This is what you can expect to end up with, which is indeed a glorious result, well worth the potential hassle of procurement and the time involved.  All good things come to those who give a toss and make the effort.

I'm using 3 kg of quince today; have a look at the pic (with a fork for scale) below right to see what that looks like.  These are a large old variety; some types are smaller so you might need more individual pieces but the great thing about this fruit family is that it includes apples (both regular and crab) and you can chuck these guys in to make up the weight if necessary.  It will make little to no difference to the result.  I'm adding about half a kilo of my own crabapples just because they're ready and will be wasted otherwise.  It's a relatively simple recipe but do read it through before attempting; you can buy jelly-making cheesecloth online and increasingly in shops.  If you need more jam-making advice, click here.
Picture
There are two parts to this procedure, and the second stage can be deferred for a few days, which makes it pretty convenient even if you're pinched for time.  We're going to boil up and extract the juice from the fruit first, then cook that up with the sugar to form jelly.  First things first; fruit prep.
Picture
< Quinces are often covered in brown down or fur; wash this off and cut out any bruised or manky bits before chopping the whole lot roughly and chucking it into a big pan of water.  Core, stalks and all.  Same goes with the crabs and any other apples you're adding since the woody bits are where the pectin that will set this jelly lives, by and large.  Quince flesh goes brown on exposure to air so keep it under water in the pot.   Below left- some crabapples.  Below middle- what a nice quince looks like inside.  Below right- what a quince with Codling Moth damage looks like- never mind, just cut out and discard this bit.  Don't waste the rest.
Picture
Picture
Picture
> The chopped fruit should be just covered by water.  Bring this lot to the boil and simmer briskly for about 20 mins or until all the fruit goes soft and mushy when you mash it against the pot with a spoon as per below.
Picture
Picture
> Now you want your cheesecloth.  Ideally your partner shouldn't be wearing it on his head (unhygienic and distracting) but he's a simple creature and I don't like to disappoint him.  Spread the cloth over your sieve/colander and ladle out some fruit+juice so that the liquid runs through them into the bowl.
Picture
Picture
Picture
The purpose of this procedure is to extract the juice from the pulp without any junk getting in to cloud up the jelly, if you know what I mean.  Hence the straining.  Process the entire contents of the pot in batches.
Picture
Everyone says not to squeeze the pulp, but I do it all the time.  Go ahead- squeeze that bitch.  Squeeze it quite hard (not too hard).  Unless you're in some sort of neurotic arms race with rival kitchen bitches, trust me- no one gives a shit how clear your jelly is.  I squeeze and still get a perfectly clear-ish result and nobody throws me in jail.  But if you're not going to squeeze the pulp, expect to leave it overnight to finish dripping.  Uh huh.  That's why I squeeze.  Below left- this is what you'll end up with; pinky juice and the leftover pulp.  You can dig it into the garden or compost heap.
Picture
Picture
At this stage you can put the juice in the fridge and leave it for a few days, perhaps as long as a week.  

But we're pressing on today.  Below- measure the juice as you pour it into the cooking pot; I got 9.5 cups from 3kg of quinces + 500gs of crabapples.  To this you add roughly two thirds of that volume's worth of sugar, so 9.5 cups will need about 6 heaped cups of sugar.  Chuck it into the juice and squeeze two large lemons in with it; this acidifies and preserves the jelly.
Below right- the jelly liquor in all its glory.  It goes a milky colour with all the sugar but that will dissolve.
Picture
Picture
Picture
Picture
> It will foam up like this.  Reduce the heat slightly and let it recede, then bring it back to high heat once more.  This will happen a lot; be prepared for it. 
< Put the ring on high and get that liquor boiling hard.  It's important to always supervise this end of proceedings as it will boil over disastrously at the drop of a hat.  Don't let any undissolved sugar stick to the bottom and burn- mix it really well.
Picture
Thoroughly wash your jars and lids and put them on a tray  in the oven at 100 or so degrees C to sterilize.
Picture
< After about fifteen mins, pour a little liquor onto a cold plate.  It's still thin and watery and won't hold the trail of the finger you drag through it.
>  After another ten minutes or so a new sample of jelly should start to keep the shape of a cross.  Keep boiling.
Picture
Below left- Slowly your liquor will start to visibly thicken in the pot, becoming deep candy pink, molten-glassy and heavy against the spoon.  Keep cooking past the point where you would stop for regular jam, or it won't set and go stiff like jello (US) or jelly (Rest of the World).  Below right- after about 40 mins boiling a sample poured onto the plate will bunch up like this as though it has gelatin in it, feeling stodgy, sticky, holding its shape and thickening further as it cools.  If it doesn't, be disciplined and keep reducing it- you'll get there eventually and it's vital to do so.  Skim the white foam as well as you can from the top of the jelly and discard, then get out your jars.
Picture
Picture
Picture
< See what happens when you're too lazy to skim the white stuff properly, lol?  It's not a great look but it won't hurt your jelly and settles down a bit as it cools anyway.  This lot made 5 and 3/4 jars of varying sizes, but each batch is different.  Better to have too many jars than not enough. 

Serve on toast and cakes and plop a tablespoon into gravies, stews, curries and sauces for a rich mysterious sweetness and fruity complexity that'll have everyone wondering how the hell you do it.  Refrigerate once opened but quince jelly will keep sealed for well over a year.

*   Why stop now?  More Kitchen Bitch here   *


Kitchen Bitch: Goat Curry.

11/3/2014

 
Picture
I've been making a curry almost every week for the past twenty years of my life.  That's well over a thousand of the darn things.  I freely bastardise and refuckulate, smerging Tamil, Malay, Mughal and misc. into some very fetching concoctions and a few spectacular failures, just like a million kitchen bitches before me.  It's just a spicy stew after all, endlessly mutable and a friend to the pedant, the freeballing innovator and the simpering dufus alike.  In fact I am so fucking blasé about curry that I'll confess to you, complete stranger, that I use packet spice paste on the regular.  As a basis for your creations they're usually more accessible than the individual raw ingredients, as well as being considerably more economical.  Ask around for the best pastes in your region and maybe make an effort to eschew those containing palm oil, even if the cynic in me tends to believe we're eating it anyway, no matter how hard we try to avoid it.

Goat is both elusive and expensive in New Zealand; this kilo leg came in at $25 which is a lot of money, so feel free to call me an elitist hoebag and substitute whatever takes your fancy.  We're not usually this extravagant with meat either but tend to concentrate on quality rather than quantity these days.


It's best to reconcile yourself in advance to the idea that quadruped curry is a slow-mo meal, so if convenience is a concern for you, opt for chicken or fish.  Make this a day in advance or at least the morning before you need it, if at all possible.  Cheap, tough meat like blade steak or gravy beef will be transformed by 12 hours in the fridge and end up gobsmackingly and even unrecognisably delicious.

One more thing... I use a tonne of dry and fresh spices to supplement the spice paste, for two reasons.  Pastes, while providing the spine and direction of each particular curry, almost always lose the 'headspace' aromatics and these volatile notes are far more likely to persist in whole spices.  And I grew up with a Tamil aunt who acculturated us to what many might consider extreme flavours.  Don't worry, I've turned down the heat for this recipe; if you're only just getting into Indian food or need to accommodate conservative guests, you can cut the additions right back or leave them out altogether.  Except the ginger and garlic- you just can't do without those.  Depending on your spice paste, you'll end up with a 'softer', more generic-tasting result, probably with very little in the way of heat.

Whilst I'm doing a vindaloo-type thing today these instructions apply to virtually any yoghurt-sauced curry.  You do need to pay a bit of attention to the ingredient list and the advice about what's important and what's not, so have a read through before rushing off to the supermarket.  This curry will serve six, even eight peeps with the accompaniments suggested at the end.  You can bulk it out a long way with more onions and eggplant if necessary.
Picture
W H A T   Y O U ' L L   N E E D

- 1 kilo of goat.  Any cut is fine.  Defrost the day before if frozen.
- 1 packet of Vindaloo spice paste
- 2 medium onions
- Half a big eggplant or three medium parboiled potatoes, diced.
- A small finger of fresh root ginger or a teaspoon of dried ginger
- A small head of garlic, roughly chopped
- A finger of root tumeric (not necessary, nice if you can get it)
- About a tablespoon each of the dry spices of your choice: for this curry I'm using cumin, cloves, coriander seeds, star anise, cinnamon, mustard seeds and fenugreek.  Pound/grind the star anise, cloves and cinnamon to a powder if they're whole.  These are your dry masala spices.
- A big teaspoon of medium to hot chili powder for moderate heat
- Half a litre of beef or chicken stock (entirely optional- I'm not bothering and just using water)
- Rice bran oil + butter, or ghee, whichever floats your boat
- At least a cup of plain unsweetened yoghurt.  I'm using Greek-style
- A big tablespoon of quince jelly or similar jam
- One small tin or two big tablespoons of plain, good-quality tomato paste; a tin of diced tomatoes in a pinch.

Picture
Frozen tumeric root.
Picture
A nice bit of ginger.
Picture
Your whole + pounded masala spices.
Picture
Mmmokay.  Dice the onions and eggplant (or dice and parboil the potatoes if you're using those).  <  Finely grate the ginger and tumeric.  Open your can of tomato paste, make sure you've got enough yoghurt.
Below- This is what a good piece of goat (or any red meat for that matter) looks like.  Nice colour, clean membranes, silky, dry, smelling faintly of itself and nothing else.  This is the rump (meaty) end of a kid leg weighing around 1kg; to the right is the same leg cut off the bone and diced, leaving you with a clear 800 grams of usable meat.
Picture
Picture
Picture
Tip a tablespoon of the dry masala spices into the pan with the oil/butter/ghee and garlic.  Turn the heat right up.  Don't add the ginger, tumeric or spice paste at this stage- it will turn into black gunk on the bottom of the pan.  
Picture
Brown the meat in batches including the bone, dividing it into thirds and then reserving it on a clean plate once it's coloured up.  The bone adds valuable flavour- you can remove it before serving, or let your freakier guests gnaw on it.
Picture
In the same pan, brown the onions, add the eggplant or potatoes and fry until you get a good caramelized colour.  Tip some juice from the meat into the pan to help the process.

Add the browned meat to the onions and eggplant and toss in the remaining masala spices, spice paste, tumeric and ginger.  Stir this thoroughly over a medium heat for five mins, making sure everything comes in contact with everything else and doesn't stick to the pan and burn to shit.  Don't walk away from it at this stage, whatever you do.  Once everything's looking good and browned, add enough water/stock to cover, and the tin of tomato paste.
Picture
Picture
<  Oooh, secret ingredient time!  Add a tablespoon of quince jelly or any other smooth jelly/jam you've got lying around.  Nothing seedy like strawberry- go for something sympathetic to meat, like cranberry, apricot or blackcurrant.

> Simmer as is for about 20 mins, then dump in the yoghurt. The amount really isn't that important- half a cup, a whole cup- it's all the same in the end.  
< Keep it on a low heat for at least half an hour, just barely bubbling.  Leave the lid off if you feel you've added too much liquid and allow it to evaporate/cook down.
Picture
Young goat is particularly succulent and with the right treatment will yield meltingly tender results.  If you can refrigerate the curry overnight you're doing everyone a favour, but if you've got hungry people bitching in the next room, it will be edible after about 30 mins of slow heat.  Serve with basmati rice or couscous, Indian bread like paratha or naan, plain yoghurt and pickles on the side.  We like stirfried runner beans and zuccini with this curry but any vegetables will be fine, as will a trad accompaniment like dahl or tumeric potatoes.
Picture

*  More recipes & raw ingredients here & here   *


Kitchen Bitch- Interstellar Tomato Relish

10/2/2014

 
Tomatoes are vaguely evil.
There is something innately gross about them; in fact, they are the Terry Richardson of fruit, which is why I staged the exploitative shot below- to jolt you out of your complacency, obviously.  Look at a tomato and wonder where anyone got the guts to twist one off that stinky, wicked plant for the first time and put it in their mouths.  Just like Terry.

I imagine the wild-type fruit aren't much to write home about and the commercial crop here in New Zealand won't exactly get you coming in your pants either.  They're hydroponic, mostly, or at least they taste that way- if I had to characterize their flavour, I'd say it was bland, watery, low-functioning green.
Picture
Picture
I'm using store-bought tomatoes for this relish as they're cheap ($2.80 a kilo), plentiful at the moment, probably at their seasonal peak or at least as good as they're going to get.  A lot of people like to use the shittiest fruit they can get their hands on but this is a false economy and the eternal equation remains- crap in, crap out.
This recipe is an old hybrid based on that used by my great grandmother and is a trad colonial (possibly Raj-influenced) flavour.  It's a loose beast, perfectly delicious in the form presented here but eminently upgradable via fancier vinegars, posh sugars (try Demerara or cut some ordinary brown with Muscovado- oooh!) and spice amendments according to your personal taste.  The only thing I would absolutely not leave out is the curry power; it might sound whack, even budget, and you don't end up with something tasting specifically of it, but it really is the warm, throbbing pulse in the throat of this recipe.  

Don't worry too much about relative quantities- close enough is really fine.  I'm doing double the stated amount today so your volumes won't look like mine.  The recipe is fairly extrapolatable but doubling them as I'm doing is probably best left to someone who's made preserves before, just because you need a bit of experience to judge the cooking time and consistency etc.  And I wouldn't suggest trying to triple a batch unless you have gigantic commercial-style pots and utensils.  It's bulky and will spit like a bitch all over your kitchen once it's on the boil.

Start your Interstellar Relish in the morning or before lunch so you can give the salted tomatoes time to macerate.  This is a slow cooking gig.  Bring a book, put on a long-arse mix tape or reserve someone to talk to.
W H A T   Y O U ' L L   N E E D

- 1.5 kg of ripe tomatoes.  Preferably on the vine 
- 500g brown sugar (white is okaaay, just blander)
- 3 large onions, red or white
- About 750ml of malt/brown vinegar.  Or white. 
- 2 Tbs plain salt
- 1 Tbs curry powder
- 1 Tbs mustard seeds, black or yellow
- 1 Tbs cracked or mortar & pestle'd black pepper
- 1 Tsp or so of cumin seeds (optional) or cumin powder
5 or so regular sized jam jars, make it 6 if you've only got weeny ones.

* Nervous about preserves?  Have a read of this and maybe check my other jam recipes first.
Picture
Picture
> Cut them in half like this, leaving only one side with the whole core as it's much quicker to remove.  Chop them and the onions (laboriously, I know) into fairly small bits.
< This is 3kg of ripe vine tomatoes with a tablespoon for scale.  Yours should look like half of this.  Wash and de-stalk them, cutting off any bruises and manky bits.  
Picture
Picture
< I fucked up here by leaving the chopped onions out, but throw all the chopped vege into a big flat roasting tray or similar (doesn't need to be heat proof) and salt the shit out of it.
You're aiming to get the water out of the flesh, so mix it thoroughly and let it stand for at least 3 hours; overnight is also fine.  Cover it with a tea towel or foil and leave it somewhere cool.  The vege will macerate without your supervision.  
Picture
Picture
While the tomatoes are bleeding out, pound up some spices and have a look around the kitchen to make sure you've got everything.  Clean and set the jars, lids, jam funnel and any other utensils you'll be using aside, ready to go into the oven to sterilise @  90-100ºC for about half an hour.  (You don't need to do that at this point- wait til you're about half an hour out while boiling down the relish.)  Just get them ready and out of the way.
> Crocs and shitty old tights.... oooh la la ça va mama!
Another sunday in the Blackthorn Kitchen.
Picture
> See what I mean about them bleeding out?  If your tomatoes are home grown, they might not give up as much water, but you get the idea.  Drain the mix with a colander or just spoon the liquid out and discard it.  You could possibly use it in a soup or pasta sauce but I've never tried that and I'd guess it's über-salty.

Pour the vege into a large stainless pot, add enough vinegar of choice to just cover them, but don't go too crazy of you'll be there forever trying to boil it down. 
Picture
Picture
Picture
Picture
it rubs the lotion on its skin
Bring the pot to the boil and then remove from heat.  Pour in the sugar and spices and mix it really well.  Don't let any nasty sugar goobers hide on the bottom or that shit will burn like a fundamentalist in a hell of their own making.  Once you're sure it's all dissolved, bring it back to the boil.

This is the boring part.  Relish takes time.  This double batch took a full hour to reduce and caramelise at a steady/low boil but if you're just doing the 1.5 kg version with home grown fruit, you could maaaybee possibly get away with half an hour.  You can walk away from it for 10 mins while it's still thin and vinegary, but don't turn your back once it's getting gloopy or you could have major burny/sticking drama.  Mine went down to half the original volume and began to spit volcanically at the 30 min mark.  
Picture
Picture
^ This is how it looked when just brought to the boil: to the right is what you're looking for towards completion.  Thicker (but not gelled like jam, just 'reduced'), darker, syrupy, softer and stickier.  If you drip it on a cool surface it should stick and sort of condense as it cools.  You can go further than the result you see to the right and really reduce the crap out of it if you're interested in extreme savour; it turns into something quite brownish and sort of balsamic if you know what I mean- very piquant and gourmet.  We personally use this relish for so many things (and the Lovely R is such a fucking relish-glutton) that we need a bit of volume to tide us over, so I'm calling time at this point.

Try to get a good even ratio of the solid and liquid in every jar as you're filling them.  I like to make sure the vegetables are 'submerged' before I screw on the lid but that's probably just magical thinking as far as preservation is concerned.  I've never had a jar of this stuff go bad, even after a full year.  It's very stable stored dark and cool in a cupboard somewhere.  Do keep it in the fridge once opened, though.
And there it is below- exactly why you've gone to all this trouble (yes I recycled this shot from the quail egg post, shut up).  Interstellar Relish is great with virtually everything; in its capacity as desperate amendment to something that just will not stop tasting like arse no matter what you do- stews, pasta sauces, curries, soups etc- it more than earns its euphonious epithet.  Divine with cheeses and smallgoods of every description.
Picture
Picture

*   Like to cook?  Interested in the raw ingredients too, perhaps?  More recipes here   *


Kitchen Bitch- Cooking Quail Eggs.  And a bit about Quails.

15/1/2014

 
Picture
Quail eggs are generally those small chocolate-splotched numbers you see clustered in fancy gourmet food emporium cartons with the WTF price tag.  We pick them up from the bottom of our aviary, courtesy of our Coturnix (Japanese Quail) family.  The small dusty blue guy in front is Napoleon, a widower of the Chinese Painted Quail persuasion; Napoleon likes big butts and fancies Hilary and Lightning Bolt, our two larger girls.  The darker gingery beast is Michael Fassbender, our cock (yes, that is the technical term) who fancies himself, mainly, treating us to a surprisingly loud and incredibly annoying whiplash crow-loop during the breeding season.
Picture
Picture
Over summer Hilary and Lightning Bolt provide us with an average of 12 eggs a week.  They're fertile, but these domesticated birds are clueless and cannibalistic parents; Hilary's mother-of-the-year routine consists of standing briefly next to her egg with a far-away look in her eye, then wandering off.  A bit like some people, really.
Picture
Picture
Beautiful they may be; intellectual giants they are not.  Hobbies include/are pretty much limited to lying in the sun and quallowing (digging holes in the floor litter) in order to dust bathe.  Dust bathing is big with galliformes and the three in the first pic are busily engaged in trying to dig and occupy the same quallow simultaneously, regardless of the laws of physics.

Factory-caging birds of the chicken tribe is especially cruel given their obsessive passion for fossicking and excavation.  It's their whole world, really, which is why we ensure these guys can frolic in pine needles and dirt to their hearts' content.  
Picture
We've eaten home-grown eggs after two weeks with no ill effects, but then life's pretty cheap to our sort.  If yours are store-bought they've probably been washed, which reduces their shelf life, so aim to eat them in a week; as soon as possible is best.  Store them in a cool, dark place, out of reach of pets and children.  We never refrigerate ours but if you're somewhere hot and humid you might like to do so.  Quail eggs can seem like a dauntingly exotic delicacy but don't be intimidated.  They're gastronomic gimmickry, really, tasting exactly the same as a regular chicken egg @ ten times the price and hassle, but who cares?  They're cute.  And luxe.  So let's do this.
W H A T   Y O U ' L L   N E E D

- Quail eggs.
- A small saucepan + water, or if frying them, a small frying pan + butter + rice bran or olive oil.

T O   B O I L -  For 12 eggs, bring about half a finger's depth of water to the boil in a pot and then remove it from heat, spooning the eggs carefully into the hot water.  You don't want to crack the shells at this stage so a fast boil is not ideal- turn the ring right down when you put them back on the heat and just simmer for about 8 minutes.  This should get you a hard-boiled egg.  You can leave it longer so don't panic.  3-5 minutes will yield something sloppier, yolk-wise, but we don't care for this ourselves.  
Picture
Picture
Picture
Picture
Drain the cooked eggs and inundate them immediately with cold water, changing it a few times to really chill them down.  This makes for easier peeling; it also prevents that nasty grey ring from forming around the yolk.

Give it five minutes then take each egg and roll it gently but firmly on a hard surface, cracking the spotty shell all the way around, then peeling carefully; quail shell is more membranous than that of a chicken egg (and powder-blue inside!) so it's best to leave this to someone with fingernails.  Sprinkle with salt/pepper/relish and serve warm.
T O   F R Y - exactly as you would a chicken egg, with a thought for scale- obviously they will cook more quickly.  We like to use a mix of butter and rice bran oil in the pan; this is both tasty and has a high smoke point.  Bring the pan to a good medium heat, remove from the ring, crack the eggs carefully over the fat, switch off the element and leave the pan to sit on it with the lid closed for about 6 minutes.  This will render the yolks solid if not totally opaque so if you like them runny, cut down the time.  The fresher the egg, the more cohesive the white will be; I didn't get the pan warm enough while we were fucking around with the camera, so these ones spread a bit.

The steam trapped inside the pan should sweat the finished eggs off the bottom.  Be patient and lift them gently with a fish slice.  We served these on a cracker with farmhouse brie and Interstellar Relish (recipe coming soon).
Picture
Picture

Kitchen Bitch: Making Gooseberry Jam- lavishly illustrated for the benefit of people who don't have a f*cking clue what they're doing.  Carpe diem.

10/12/2013

 
Picture
Gooseberries are possibly my favourite berry of all, from a lazy ho's horticultural POV.  They will fruit happily in a shady, rubbishy spot (along with blackcurrants) and don't need to be sprayed or even really netted, unless you have some very determined avian bandits in your vicinity.  My own long-suffering bushes have been unceremoniously relocated for the umpteenth time and we've had one of the driest Novembers on record- I still get enough fruit to make a good batch of jam.  So yeah.  If you have room for them (a big m2 for each bush), look into gooseberries.  Particularly the 'Invicta' variety; they have proved entirely resistant to the mildew that has wiped every other kind I've tried to introduce in this high-humidity garden.

I know it's getting into winter in the northern hemi, but this stuff's pretty quissmassy- go buy some frozen gooseberries if necessary.  And aren't they draping Spain in polythene specifically so you can buy shit out of season?  Tuh! 

Below are the very weedy and completely neglected bushes from which we will wrest today's materials.  Note the horrible fucking thorns.  I'm wearing gloves, but there will be blood.
If you're in a hurry/already know how to make jam, scroll past the pastoral shiz for the recipe.

Picture
Picture
Picture
Half an hour and a lot of profanity later, we've got enough for jam, but you've probably just gone to the shops and bought some like a normal person.  I've thrown in some blackcurrants from the bushes behind the gooseberries in an effort the turn the results a nice rosy pink.  You really don't need to do this.  The two fruits are very closely-related members of the Ribes fam, hence their affinity.  One just tastes a wee bit greener than the other.
This lot  comes to about 1.6kgs or 3.5 pounds.  I work in metric so that's the end of my Imperial pandering.


It's 2013, peeps.
Picture
W H A T   Y O U ' L L   N E E D -

- At least 500g of gooseberries.  Any less is bound to burn before it jams.  Ripeness isn't critical.

- Around the same weight of plain white sugar as you have fruit.  A little less is fine.
- A handful + of blackcurrants for colour if you have some.  Completely unnecessary, though.
- One big lemon
- The biggest stainless pot you've got.
- 3-8 sterilized regular sized jars with tight-fitting lids.  Chutney/jam/relish jars will do fine.
- A jam funnel.  Or a stainless ladle.  Both is ideal.

(Worried about making jam?  Here's a few words of timely advice.)
Gooseberries are high in both acid and pectin and are thusly the jam queen's friend.  You don't really need to acidulate with lemon juice but I find it supports the tartness of the fresh fruits' flavour, especially if your berries are all at the raw-eating/dessert stage and have lost their green bite.  My fruit are a mix of ripeness.  Some are hard and very green, some are turning golden and easily compressable.  Before you do anything else, wash the jars and lids thoroughly (and the funnel if you have one), in the sink or dishwasher, set your oven to around 100˚C and set them up in there on an ovenproof tray to dry and sterilize.
Picture
Wash the berries and remove all the leafy shit/insects/cigarette butts.  Pick off the brown blossom ends.  Stop whining and just do it.  And stop eating the ripe ones.
I can see you.

Put the clean fruit into a large stainless high-sided pot and add enough cold water to stew them in briefly: for this amount of fruit I use about 2 good cups of water. 
Picture
Picture
It should look like this before the sugar
Enough to stop it sticking to the bottom, basically.  The amount isn't crucial, but the more water you add, the longer the jam will take to firm up.


Bring the fruit to the boil and simmer until it's squishable with a spoon, then remove from heat.  Juice your lemon and add the results to the pot along with the sugar.  
Picture
Keeping it off the heat, stir the mixture until you're sure the sugar's dissolved, otherwise it might stick and burn.  Return to the heat and bring it back to the boil, keeping it stirred and skimming off the white foam that rises to the top now and then.  If you've added currants, the liquor will start to turn pink.  Otherwise, you'll have a nice kiwifruit-green/gold baby jam happening at this point.
Picture
Drag a finger through a drop...
Picture
We're not there yet. Still too thin.
Unless you boil the shit out of it or add commercial pectin (don't do that), gooseberry jam made with ripe fruit might not 'set' to a totally stiff, rubbery consistency; it doesn't matter- anything from a thick sauce to a wobbly jelly is fine, so don't panic if you can't plant a flag in your experimental drips.  It all tastes the same and lasts just as well.
Picture
Thick and stiff (lol)? You've got jam.
E D I T : This has been a really dry year and both my neighbour and myself have found that our gooseberry jam has set like a mofo so if you're using a lot of unripe fruit or it's been hot and arid, add a bit more water or cut back your cooking time if you'd like to avoid a rock-hard set.
Picture
^ The stodgy texture of hot basaltic lava is what you're looking for.  You'll be boiling it anything from 10 to 20 mins.  Keep dropping it on a cold plate or benchtop until you get a satisfying blobbiness when you poke at it.

It will set further in the glass as it cools, so don't be too fussy.  Fill your biggest jars first, then work down to the smaller ones; if you have an awkward amount left over, just refrigerate in a bowl and eat it first.
Picture
Seal jars while still hot, set aside to cool.  Twist the lids on hard to make sure you've got a good seal.  I got three big jars and two small from this amount of fruit.  This jam is delicious in so many contexts; everything from trad toast and muffins to flavouring gravy and sauces and pouring on icecream.  Its pretty colour (pink or green) tends to impress the hell out of the culinarily-declined, so dress up the jars and you've got some presents to pass around.
S T I L L   B O R E D ?   M O R E   K I T C H E N   B I T C H   R E C I P E S   HERE

<<Previous

    RSS Feed

    Picture

    Independent Creativity
    Hi-Fi Introversion

    ORIGINAL CONTENT
    HONEST REVIEWS
    VELVETEEN VERBIAGE
    VISUAL LUXURY
    MORBID IDLING
    THE NATURAL WORLD
     
    ​photography  
    film
    flora  fauna  culinary
    ethnography  objet
    ​

    modest living
    ​vintage shit

    A U T H O R
    Picture
    K ✂︎ l l y
    congenital delinquent
    Human Durian
    celebrating
    glorious deviation in the land of
     the long white cloud

    -  New Zealand  -


    - T h e   B o o k -

    Picture
    T H E  
    B L A C K T H O R N
    O R P H A N S


    What is freedom, when it is
    all that remains to you?
    In exile two brothers pursue an anarchist's trajectory,  from an old world into the new, from East to West, subject always to the pleasures & horrors of an enduring flesh, to the ironies of karma & impunity. Love bears thorns, the lost return & the dead are haunted by the living. 
    ​

    E P I C   D A R K   F I C T I O N
    *   R E A D   *
    T H E
    B L A C K T H O R N 
    O R P H A N S
     O N S I T E  

    H e r e


    Picture

    Selected
    ​Ravings

    opinion essays observation private regret public 
    exaltation semicoherent speculation 

    Picture

    Photoessay​

    epic undertakings
    documented

    ​
    Picture

    Hostile Witness FilmReview

    Cruel but fair

    Picture

    RubyHue 
    ​
    Lipstick Review

    Lipstick: love it
    ​

    Picture

    Our Photography​

    we've seen worse
    ​

    Picture

    Port Chalmers​

    Dunedin, New Zealand
    ​

    Picture

    Blackthorn ​
    ​Rose Review

    Garden Hoe Wisdom
    Picture

    Verse​

    Loss, love, truth, beauty everything, everything
    ​
    Picture

    The  Lovely R's Blog​

    Likes photography  Knows a bit about it

    Picture

    We Liked This​

    Amazing things from other people
    ​

    Picture

    Cacti, Aloes
    ​&
     
    Flora​

    Our garden & general vegetal splendours
    ​

    Picture

    KitchenBitch

    Home cooking
    & raw ingredients
    ​
    Picture

    Ethnographic​

    Strange wonderful things from elsewhere
    ​

    Picture

    Jewellery
    ​

    Picture

    Tiny Little 
    Dinosaurs
    - a book for children -


    All images & text property of the authors 
    ​
    unless stated

    © us
    & original sources
    All Rights Reserved


    Picture

    Privacy Policy
    ​This is a noncommercial site.
    No ads. No shady data jacks. 
    No interest in your bizniz.

    ​We don't personally view, utilise or sell your data, apart from occasionally checking totally anonymous + super basic site view stats. We don't even know how to monetise that stuff, so don't worry.  Everyone's privacy is important to us.

    Our platform is probably harvesting your data, though, via their cookies. Look at their privacy page so you can see what they're up to.

    Please use Adblock or something similar.
    ​
    Google et al superimpose ads that we never see a penny from so fuck them.

    Picture

    Archives

    February 2021
    January 2021
    December 2020
    November 2020
    September 2020
    June 2020
    May 2020
    April 2020
    February 2020
    January 2020
    December 2019
    November 2019
    October 2019
    September 2019
    August 2019
    July 2019
    June 2019
    May 2019
    April 2019
    March 2019
    February 2019
    January 2019
    December 2018
    November 2018
    October 2018
    September 2018
    August 2018
    July 2018
    June 2018
    May 2018
    April 2018
    March 2018
    February 2018
    January 2018
    December 2017
    November 2017
    October 2017
    September 2017
    August 2017
    July 2017
    June 2017
    May 2017
    April 2017
    March 2017
    February 2017
    January 2017
    December 2016
    November 2016
    October 2016
    September 2016
    August 2016
    July 2016
    June 2016
    May 2016
    April 2016
    March 2016
    February 2016
    January 2016
    December 2015
    November 2015
    October 2015
    September 2015
    August 2015
    July 2015
    June 2015
    May 2015
    April 2015
    March 2015
    February 2015
    January 2015
    December 2014
    November 2014
    October 2014
    September 2014
    August 2014
    July 2014
    June 2014
    May 2014
    April 2014
    March 2014
    February 2014
    January 2014
    December 2013
    November 2013
    October 2013
    September 2013
    August 2013
    July 2013
    June 2013
    May 2013
    April 2013


    Picture

    Categories

    All
    A Thing Of Beauty
    Blackthorn Orphans
    Blackthorn Rose Review
    Cacti & Aloes
    Ethnographica
    Flora
    Hostile Witness Film Reviews
    Jewellery
    Kitchen Bitch
    Make Up Review
    Maximum Respect
    Perfume Reviews
    Photo Du Jour
    Photo Essay
    Places & Things: A Blackthorn Review
    Port Chalmers
    Remembering Dreams
    Roses
    Selected Ravings
    Softcore Rendition
    Sweetmeat
    Textiles
    The Lovely R
    Verse
    We Liked This

    Picture
Powered by Create your own unique website with customizable templates.